
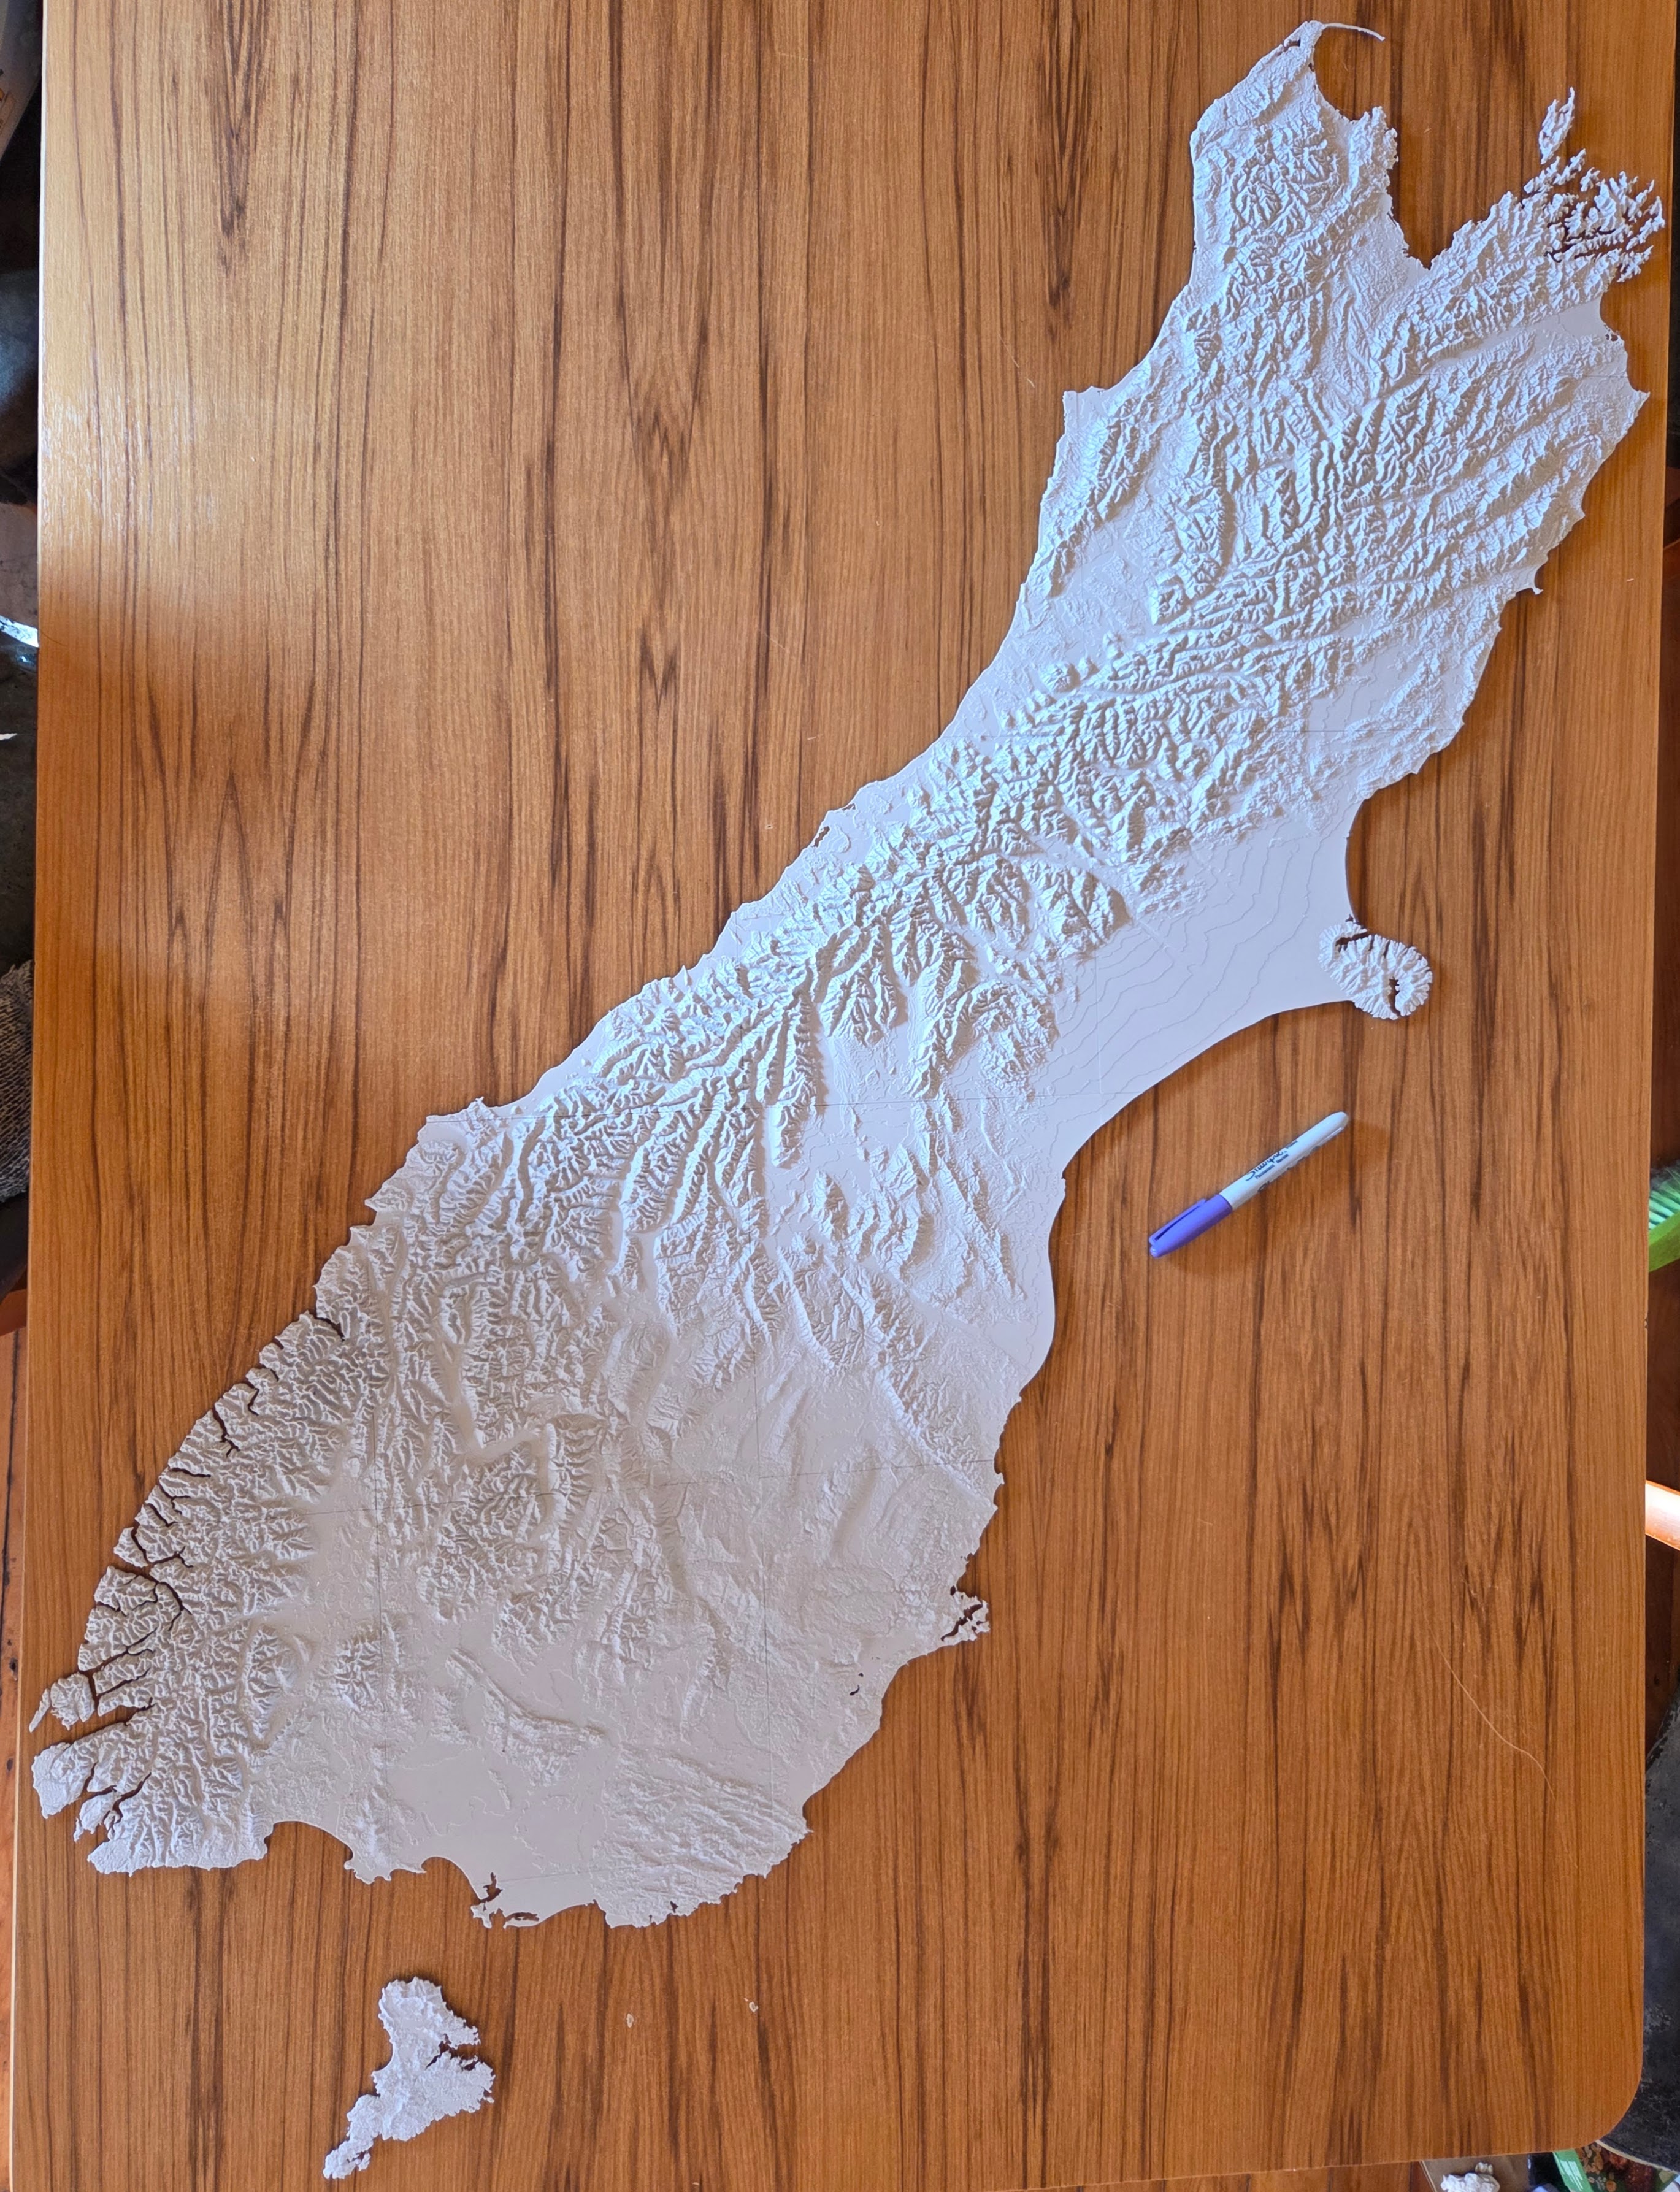
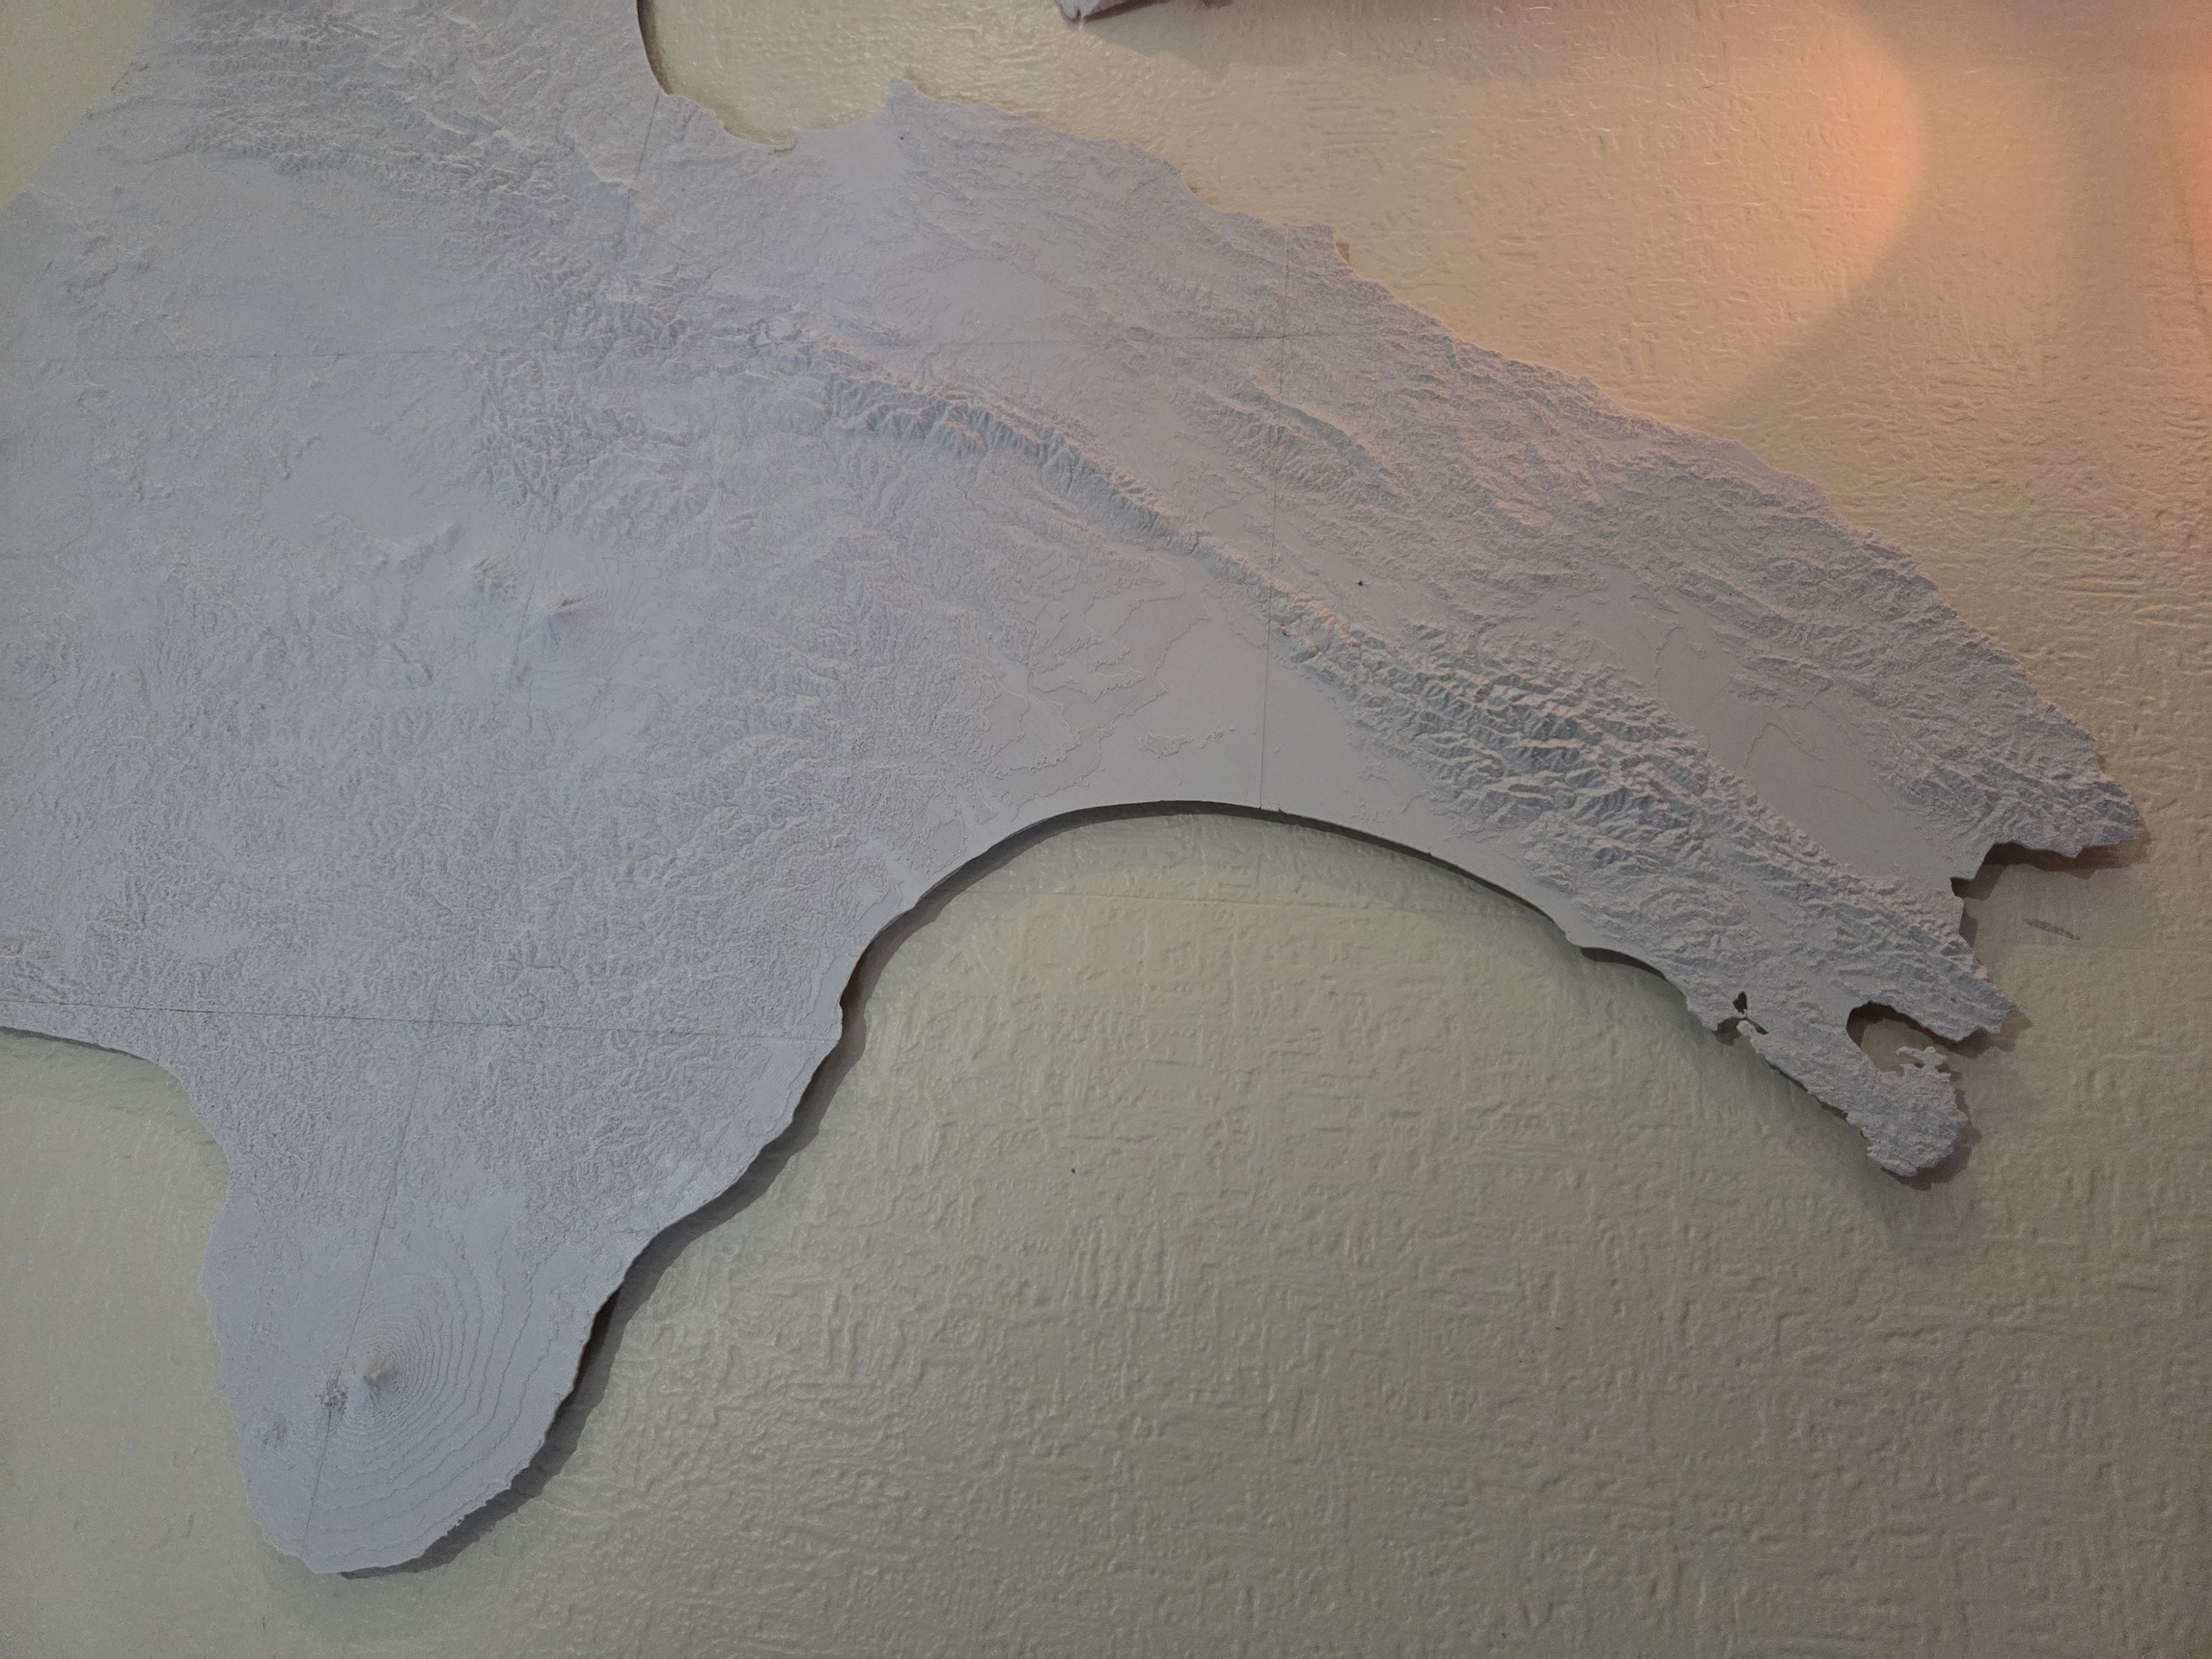
3D printed model of New Zealand
1. First you need to install QGIS https://qgis.org/download/ (install the Long Term version).
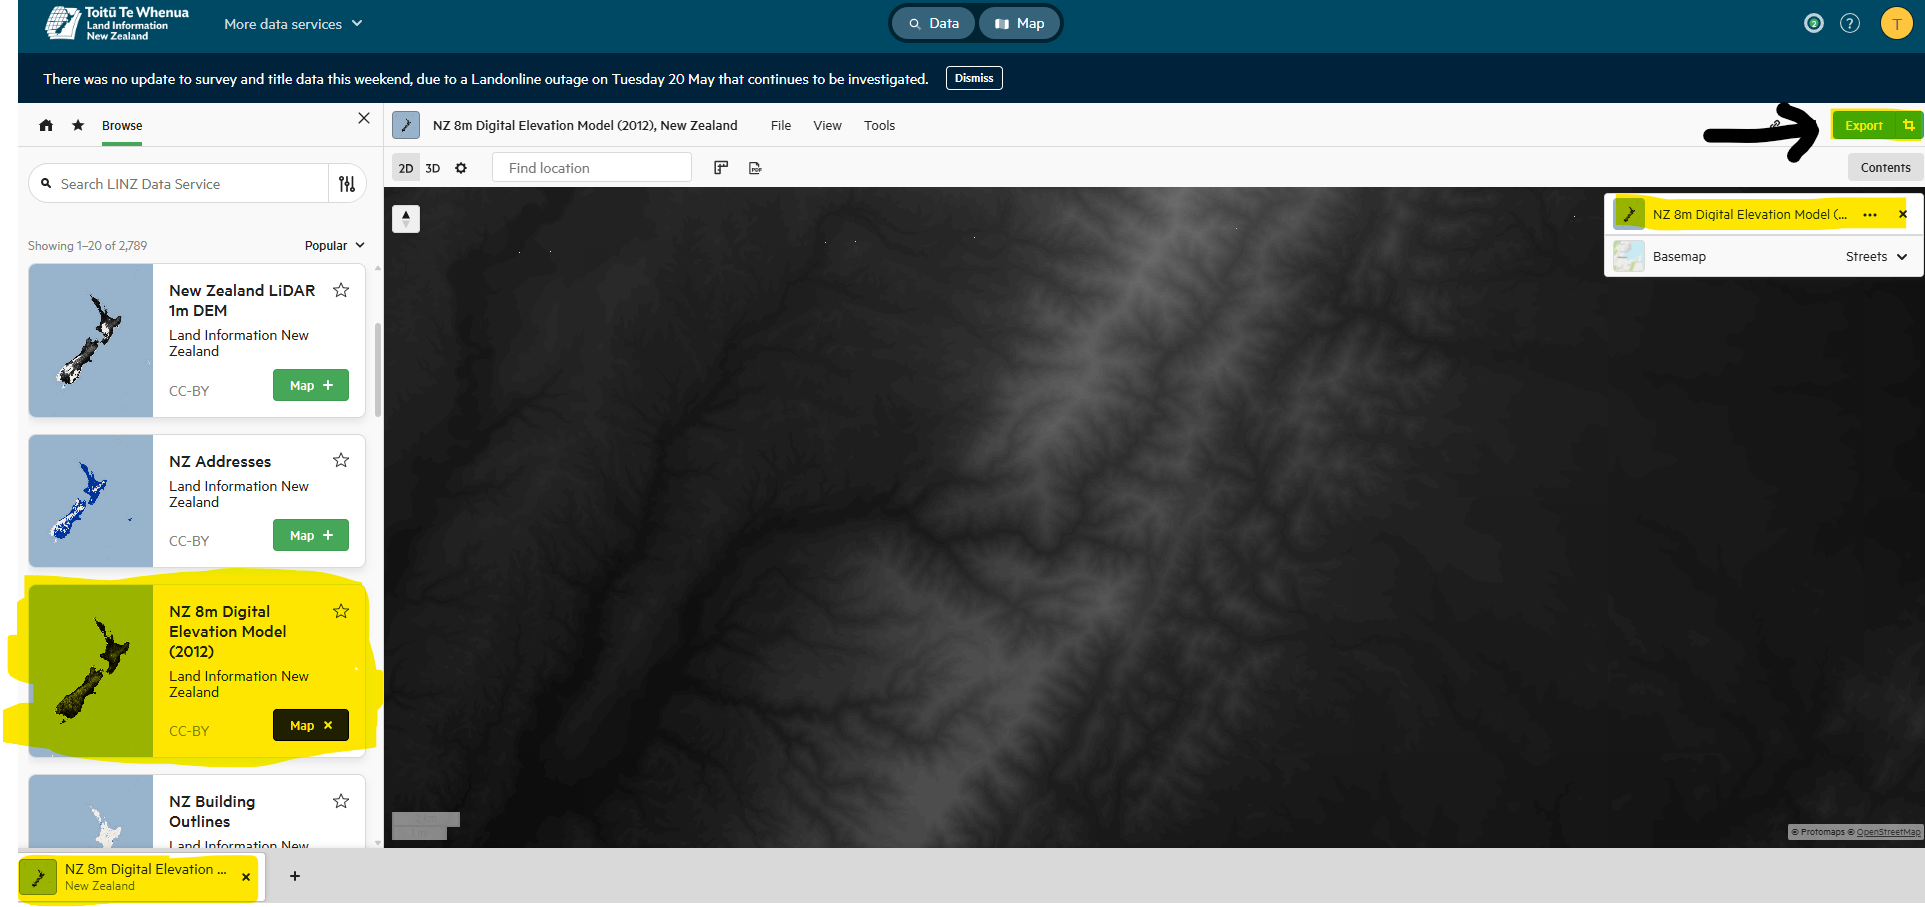
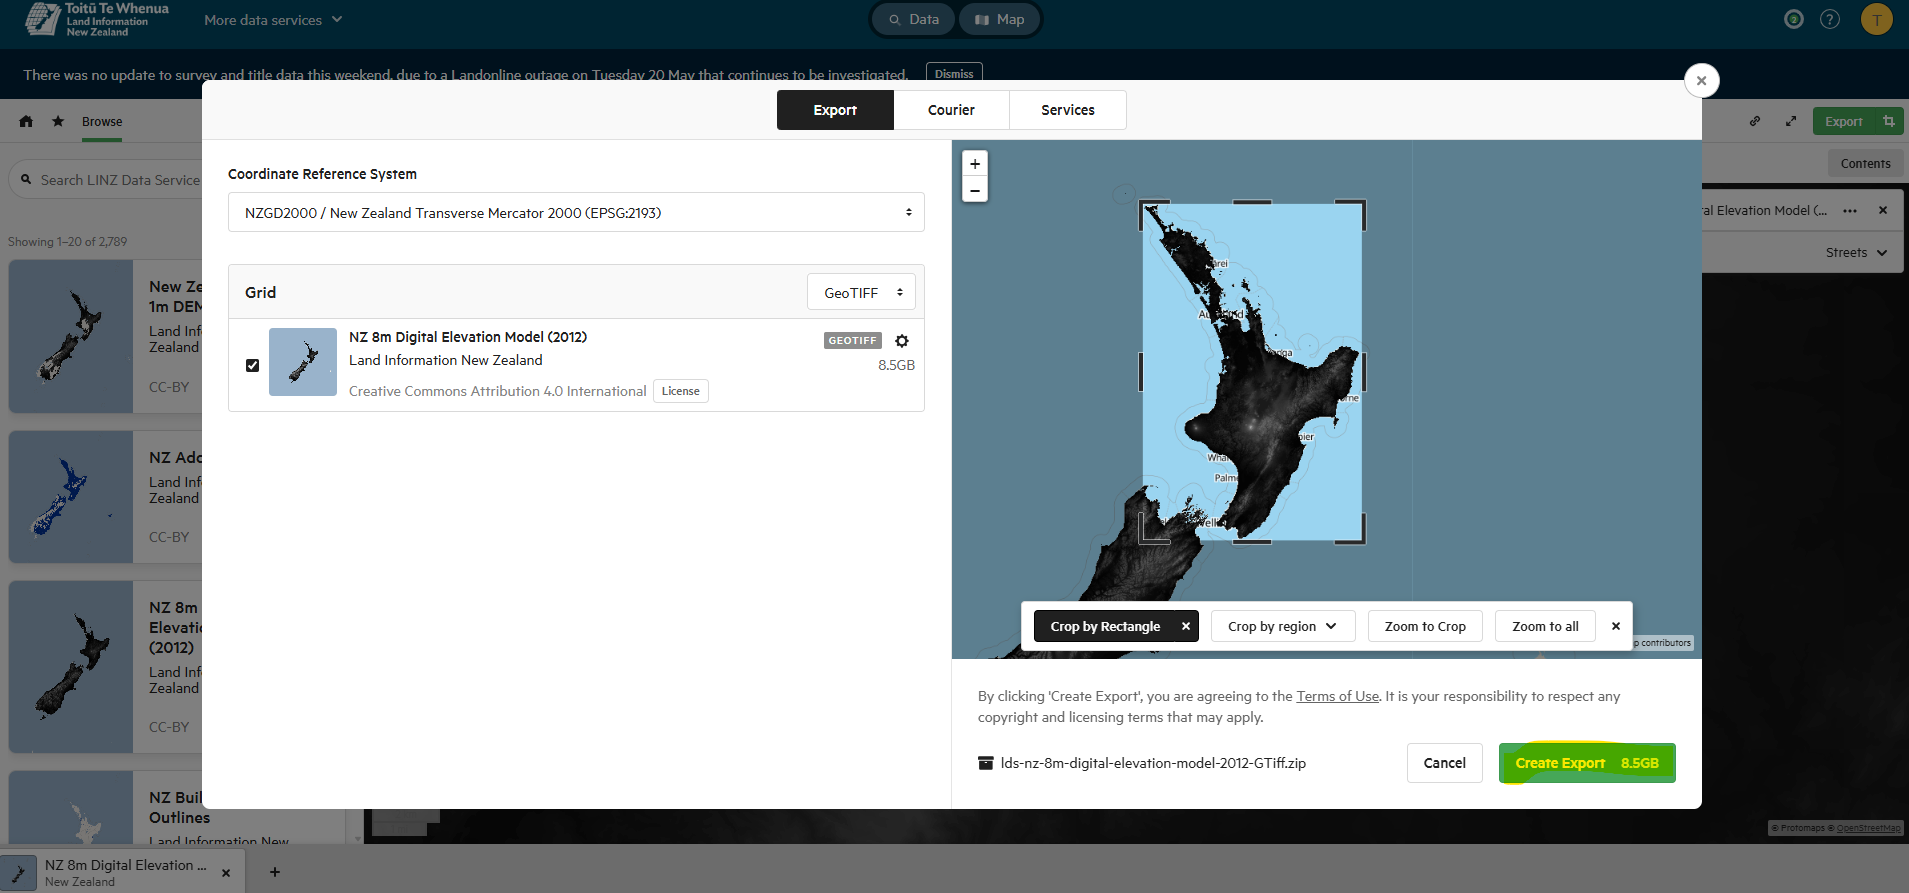
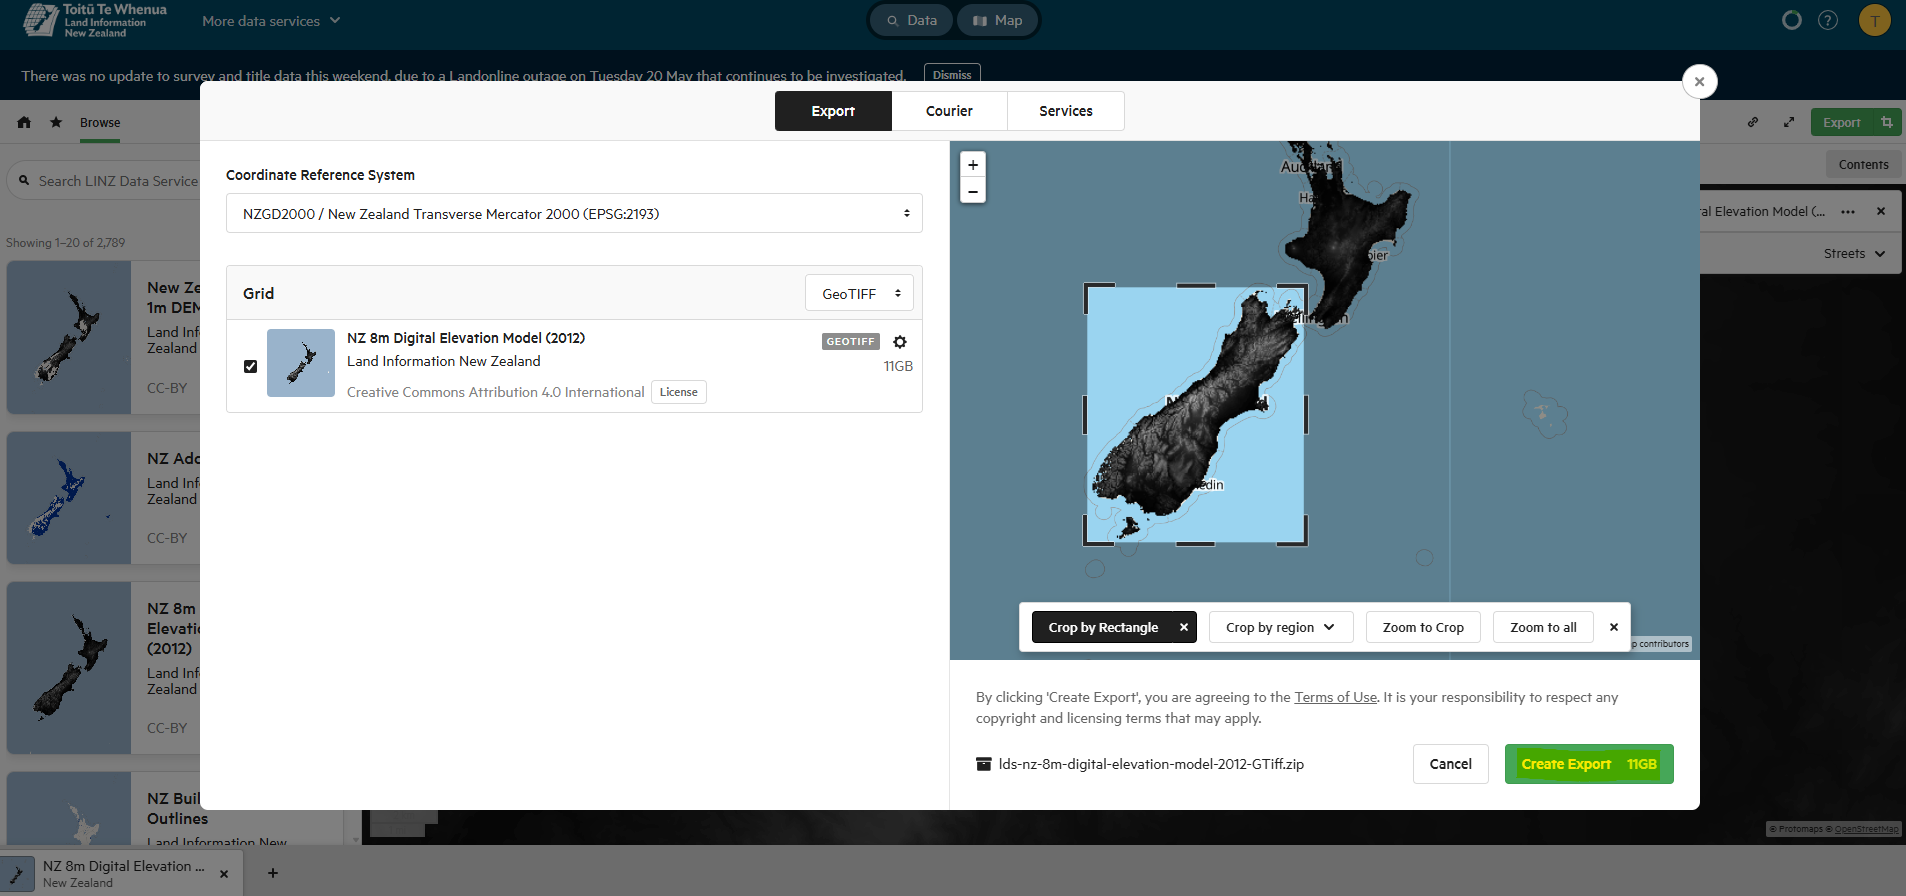
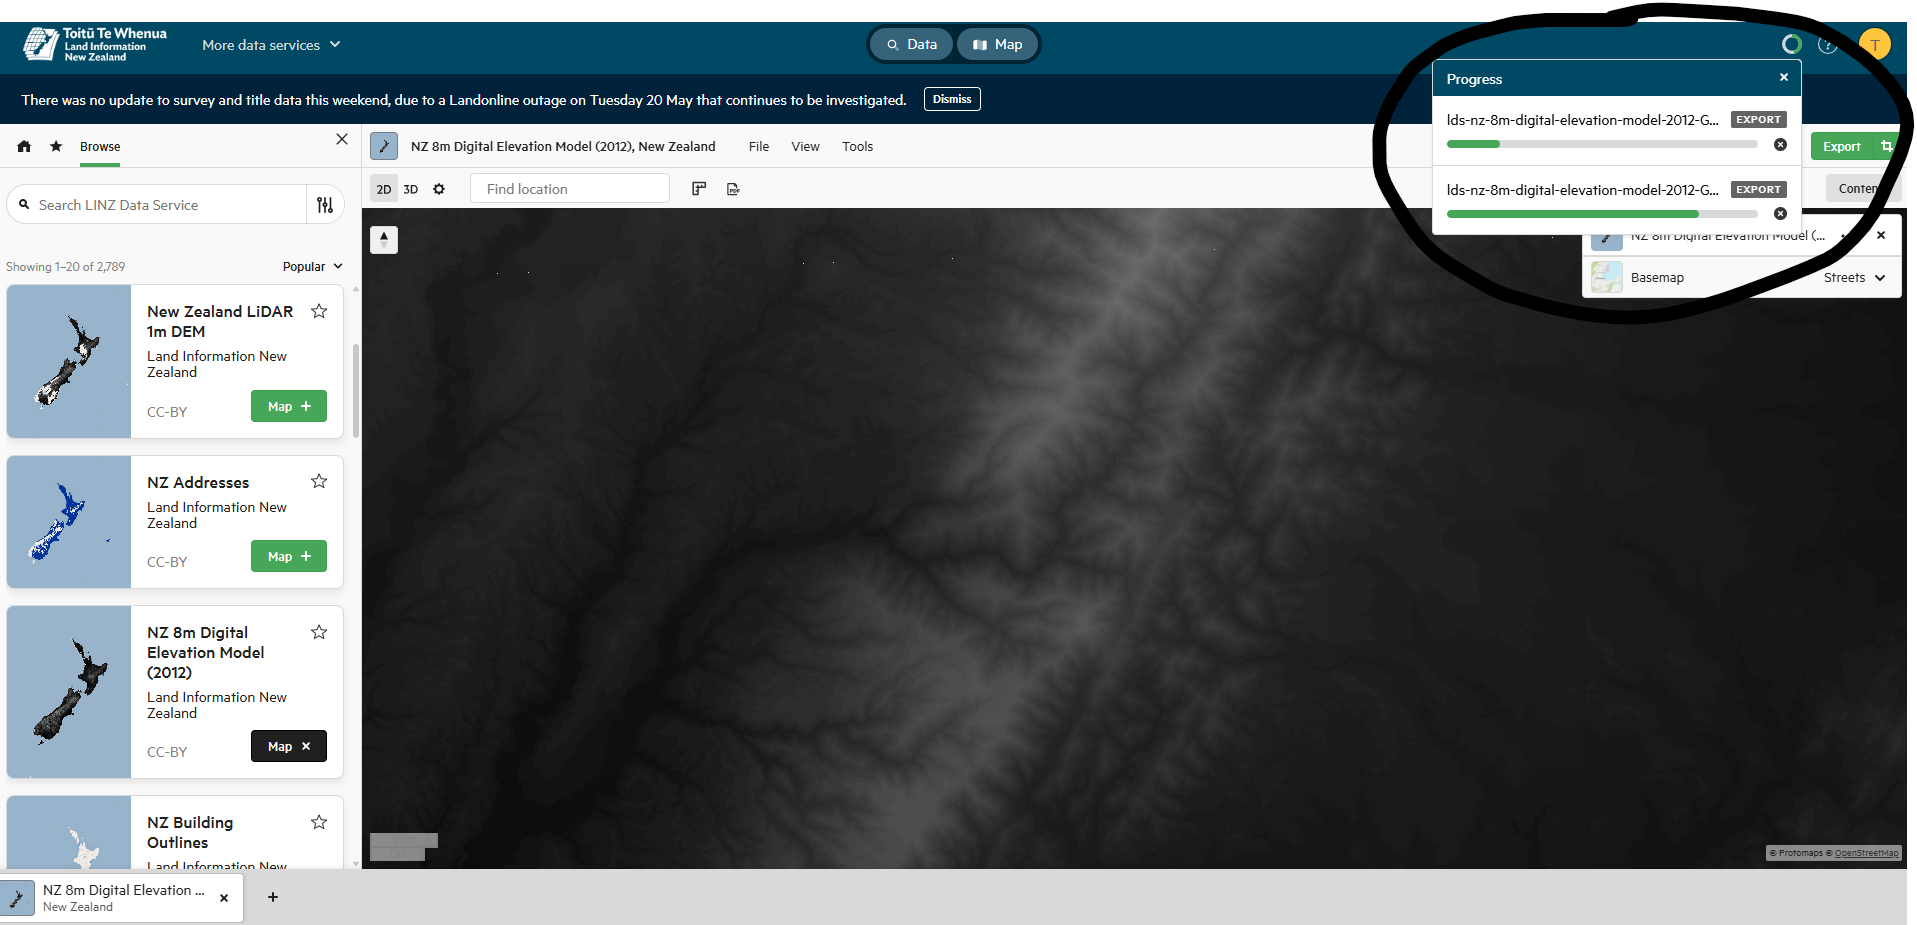
2. We need some data to work with. Thankfully LINZ provides an excellent service, go to https://data.linz.govt.nz/ and then add the NZ 8m Digital Elevation Model (2012) to your map, then click export at the top right of the map. Keep the default export settings (NZGD2000/EPSG:2193, GeoTIFF). It is too big to export as one file so you have to do one for the NI and one for the SI, use the tool to crop and export each island. They should be large files around 8GB for NI and 11GB for SI. You'll need to create a login to download them. If you can save these and all subsequent files to an SSD it will help greatly with loading times.
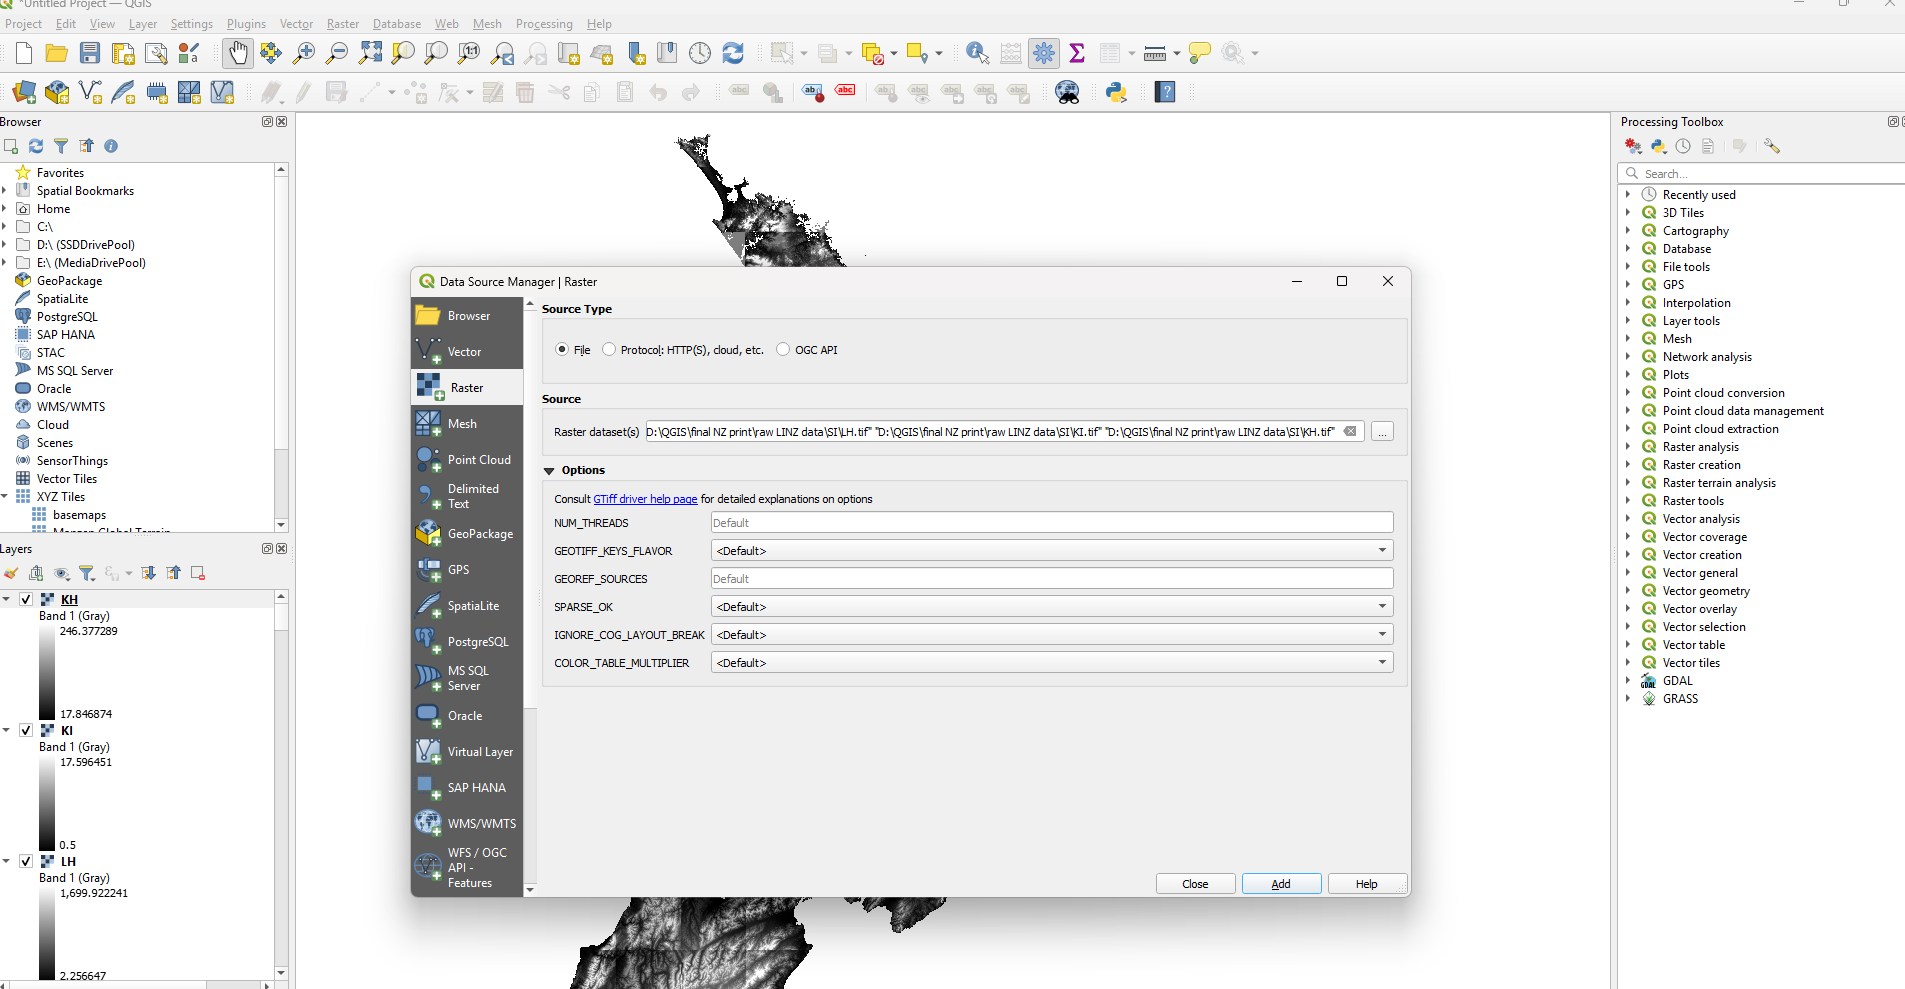
3. Now extract them from the downloaded ZIP file, and import the .tif files into QGIS by going to Layer -> Add Layer -> Add Raster layer and under Source click the three little dots, select all the extracted .tif files, and click add (you can ignore all non .tif files). It may take a while to add them all.
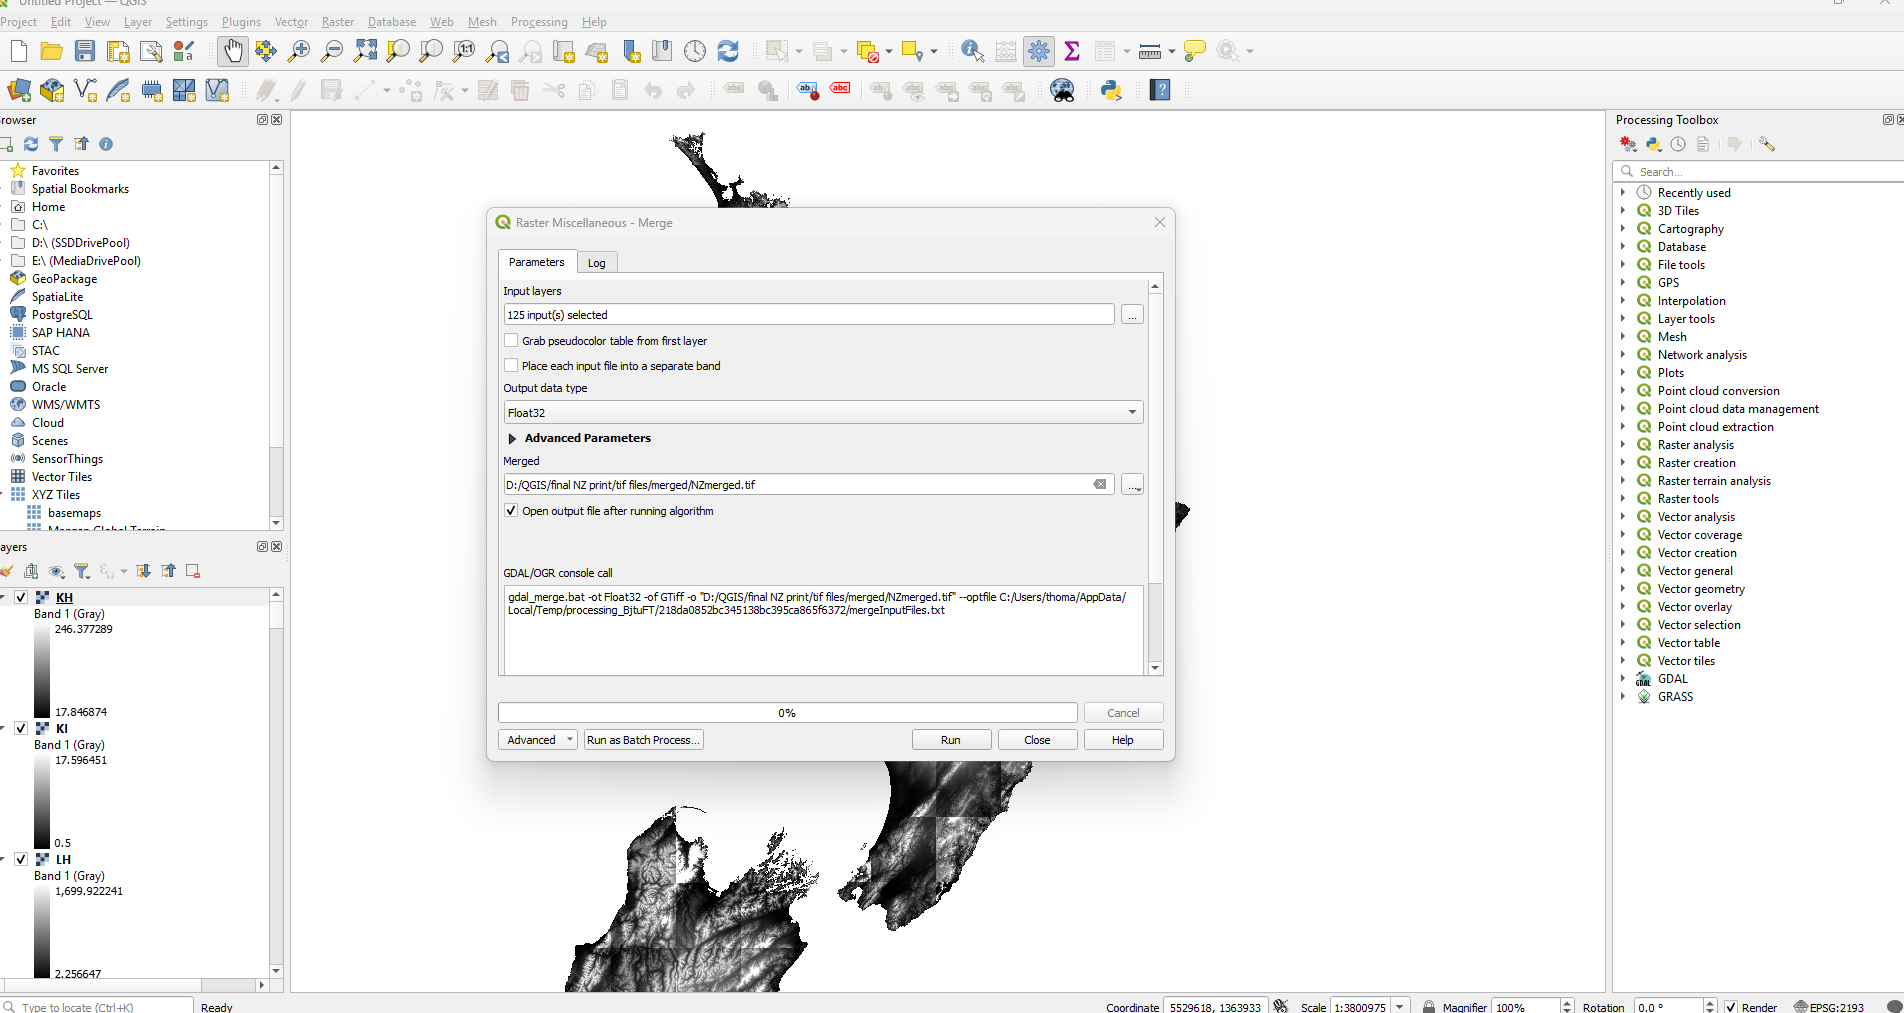
4. Now we want to combine them all into one large .tif so we can later split them up into the correct size printing tiles.
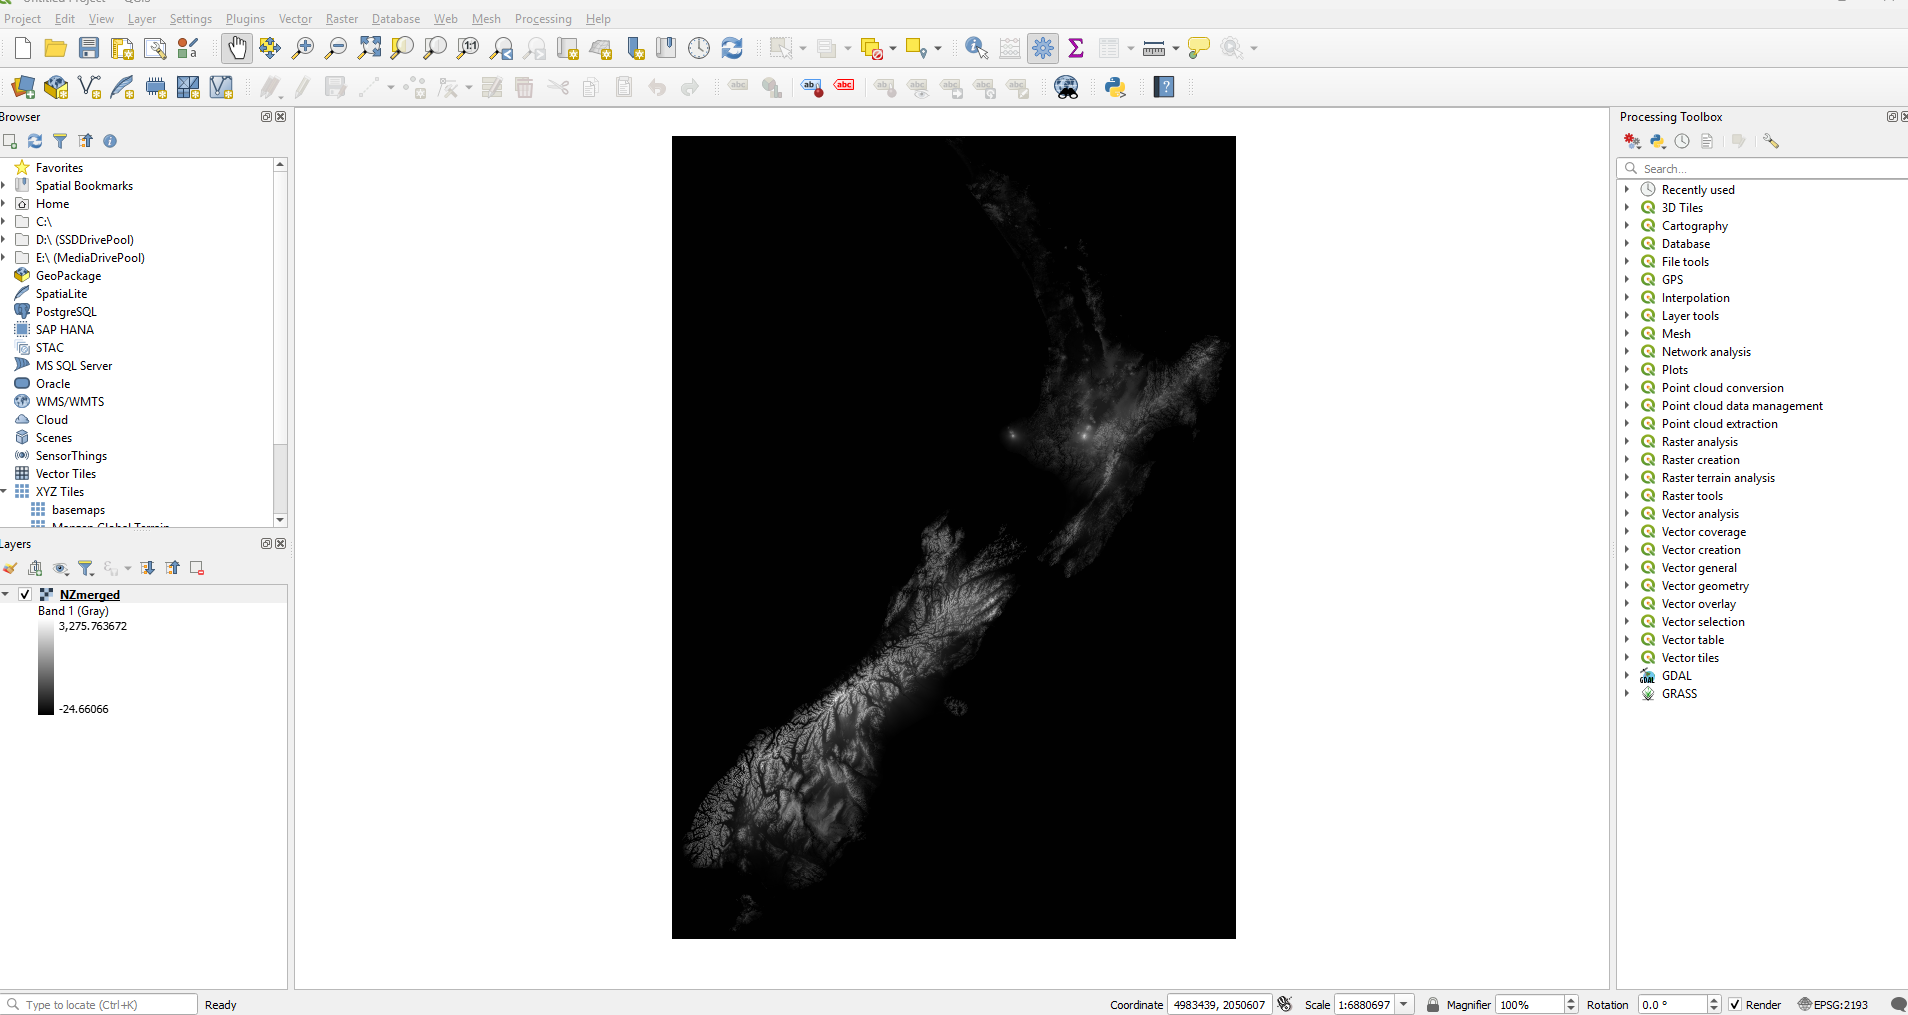
At the top go to Raster -> Miscellaneous -> Merge and select all, then change the output location to permanent storage (otherwise it will just save it as a temp file) and name the file NZmerged and click run. It should look something like this.
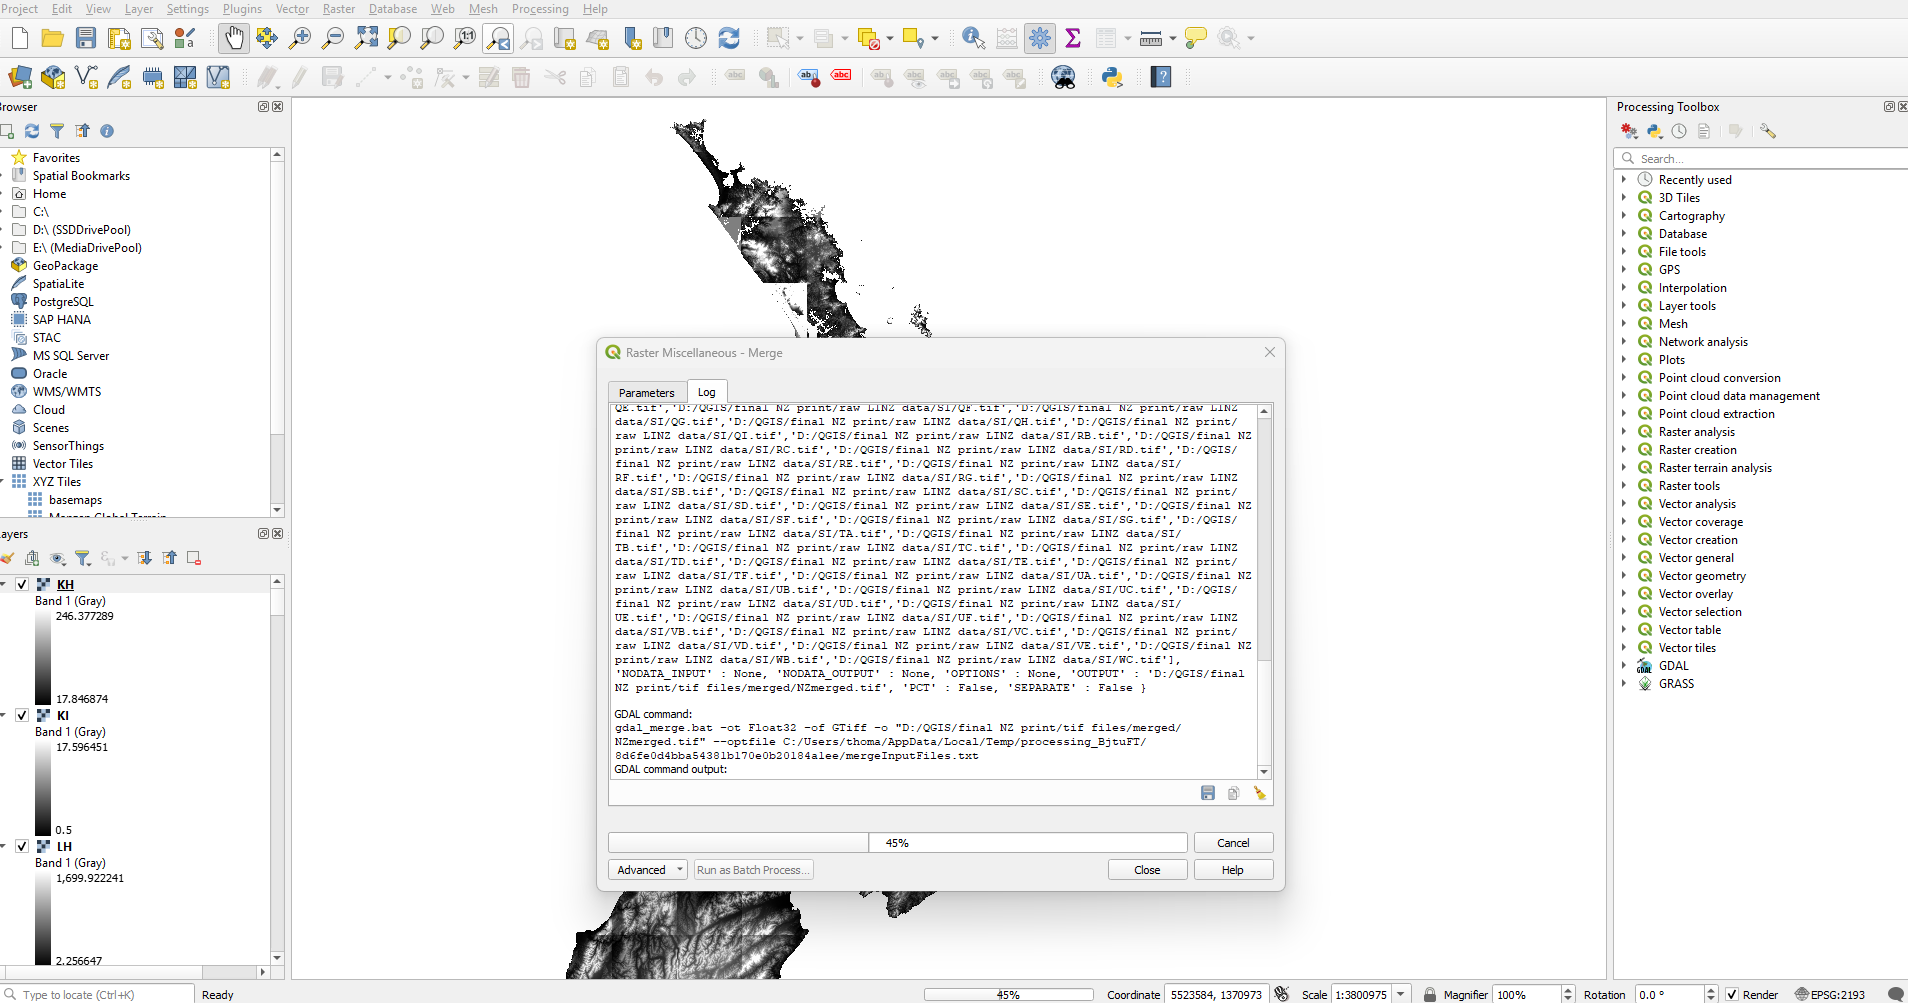
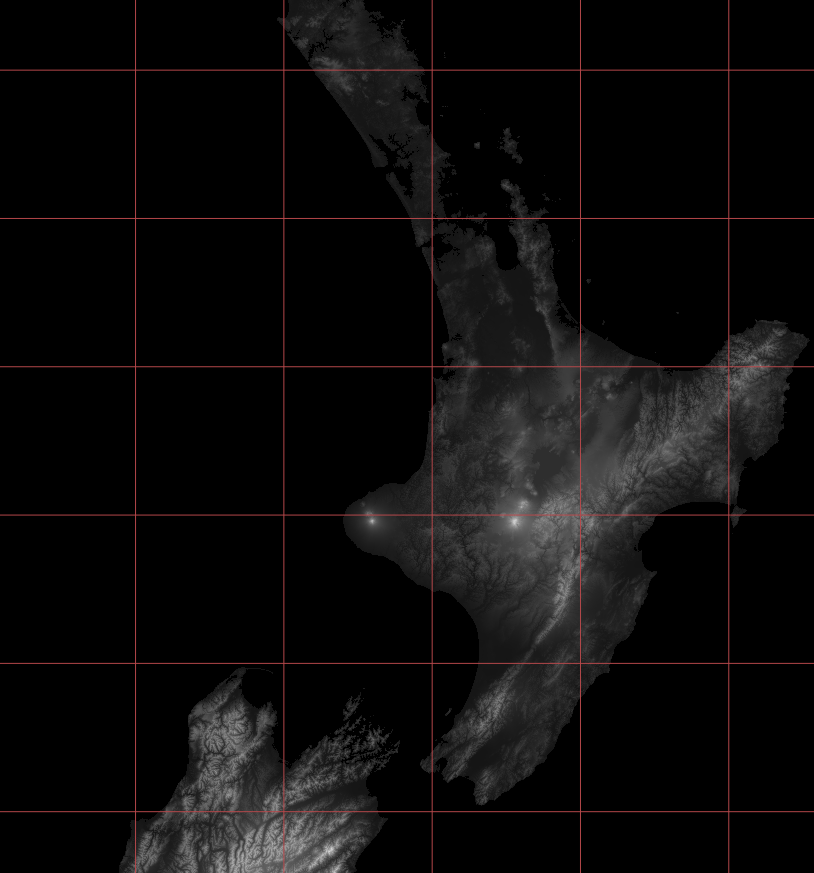
5. Once that's done and you have your very large .tif file (mine was 98GB), at the top go to Project and create new, you don't need to save the old project. Now go back to Layer -> Add Layer -> Add Raster layer and add the single combined .tif we created in the last step NZmerged. Once it's finished it should look like this.
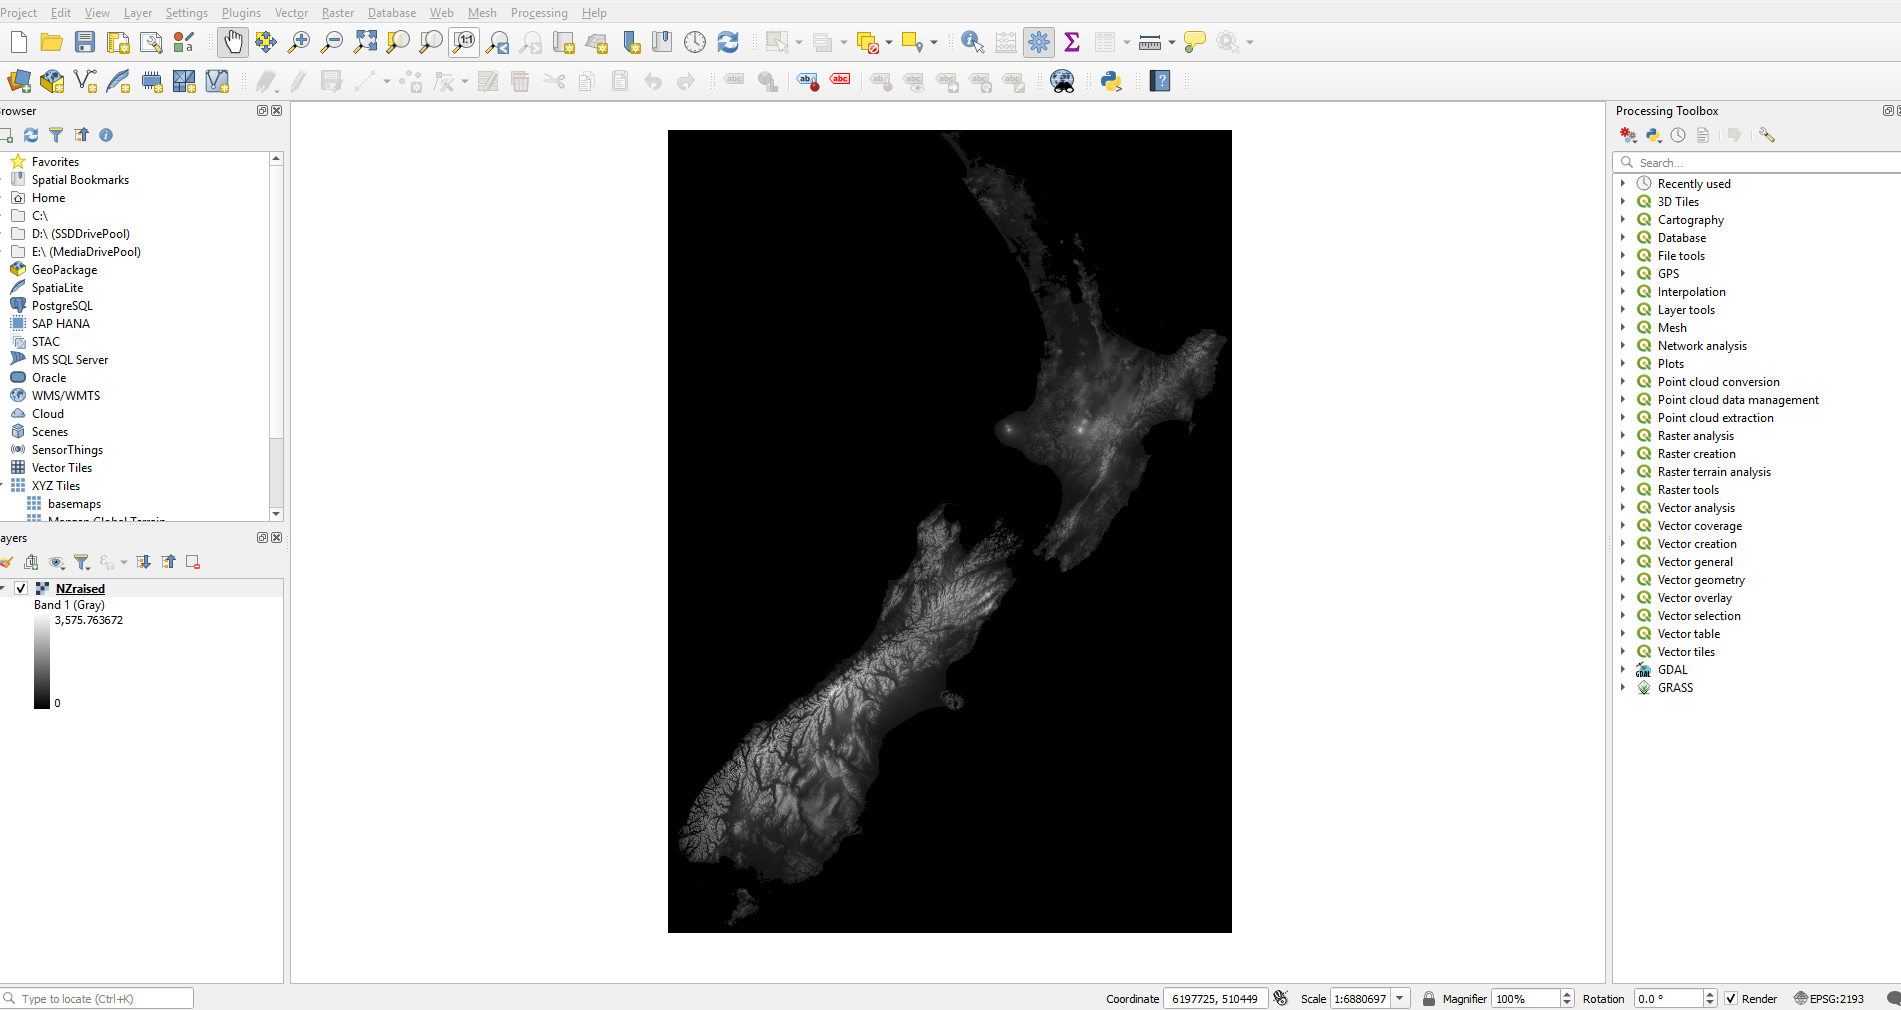
6. We now need to add some height to the base of the whole map so that we can actually print down to the coastline, otherwise the edges would be incredibly thin. To do this at the top go to Raster -> Raster Calculator, change the output location and name the file NZraised
Keep the rest of the options the default, copy and paste the following into the Raster Calculator Expression box " ("NZmerged@1" > 0) * ("NZmerged@1" + 300) " (removing the " and spaces on each side) then click ok, it will take a little time to finish. This is essentially adding 300m to everything above 0m elevation. If you do a test print at your desired size and think the thinnest part of your print is too thin you can change the 300 to a greater number and continue again from this point.
Now it should look like this, note the lighter shade across the map, and on the left the upper number has been raised by 300m and the bottom number is now 0.
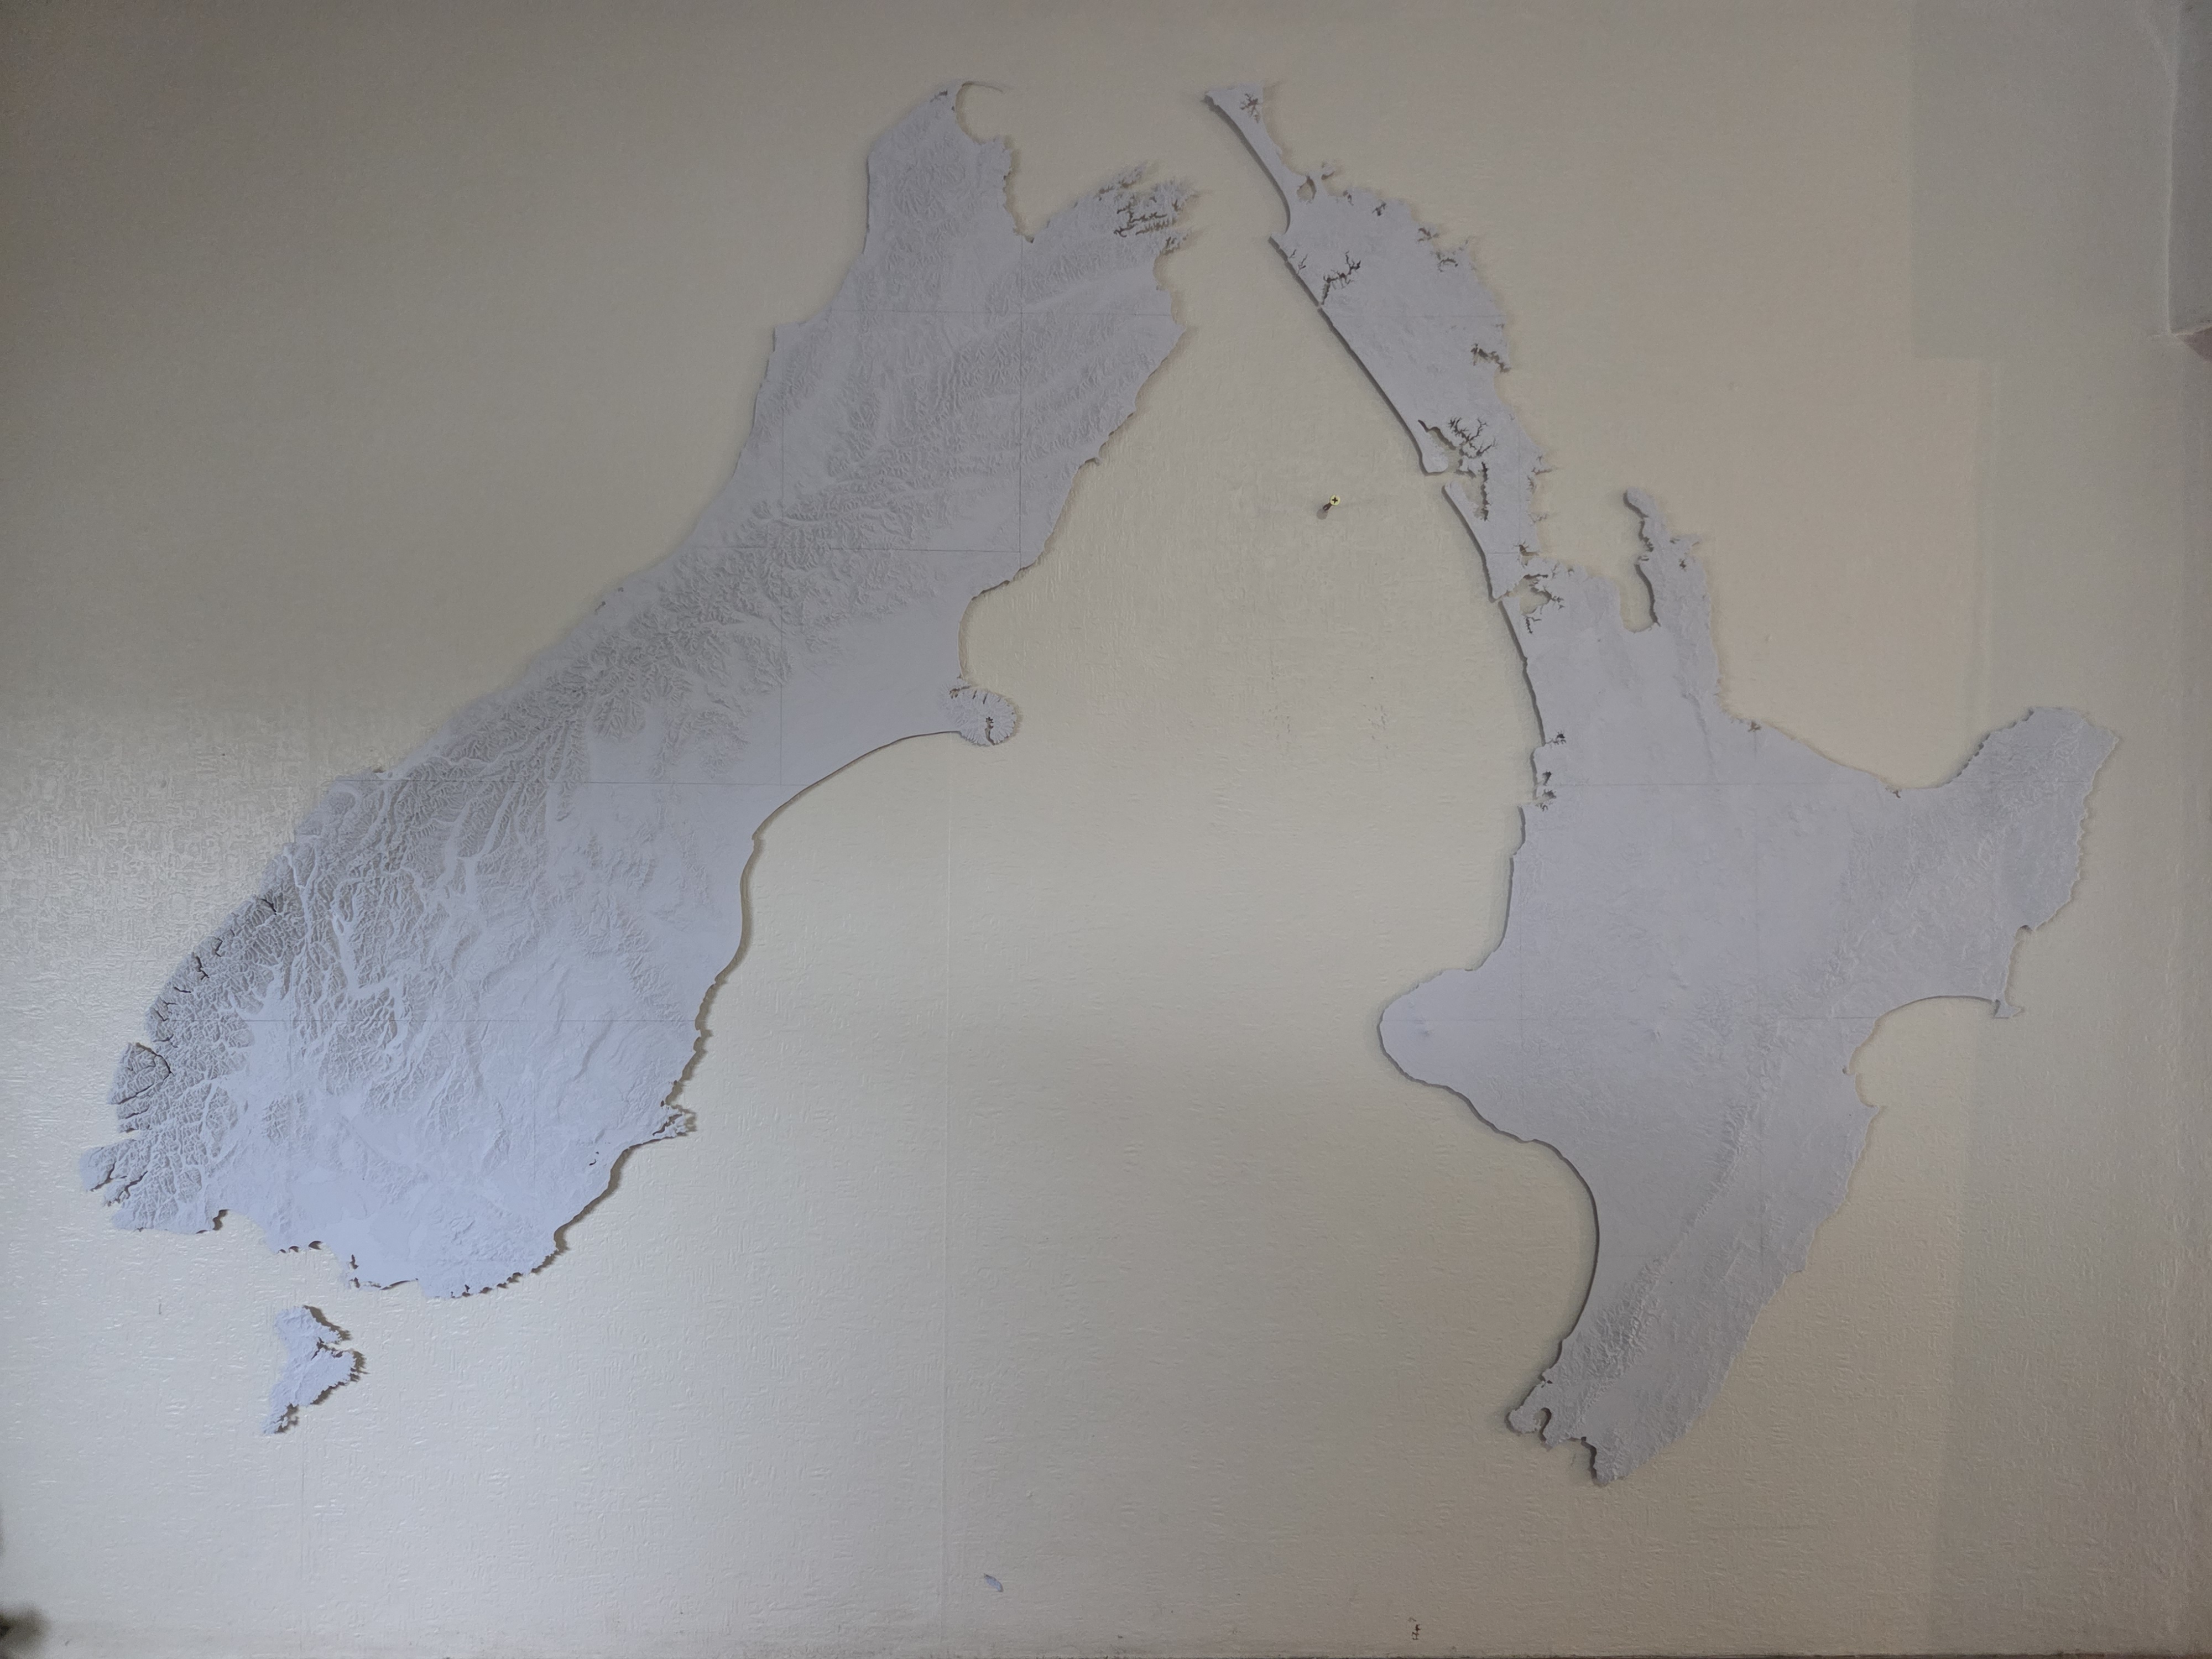
7. Now we need to decide how big you want the end project to be, I did the north and south island side by side so I could have them bigger. Measure the space on the wall it's going on, divide that by the print bed size of your printer (minus a bit, I did 200mmx200mm for my Prusa MK3S) to get how many prints you'll have, then divide either the full length of New Zealand, around 1500km vertically, or by the longer of the two islands (NI surprisingly), at around 820km vertically, to get how many km will be in each 200mm square.
For example, lets say I measure the space on the wall I am displaying it on at 1200mm. My printer can comfortably print 200mm squared so I divide 1200mm/200mm, giving me 6 tiles of height on the wall. I want to maximise the size of the print so I am going to do the islands side by side, so I divide 820km/6, giving me 136.666km per square. Convert that to meters to give me 136,666m per square.
8. This step will take some time if you want to optimise the intersections of the squares (i.e. so you don't chop off a very small bit into it's own print), it will allow us to trial and error the tiles before splitting them up properly.
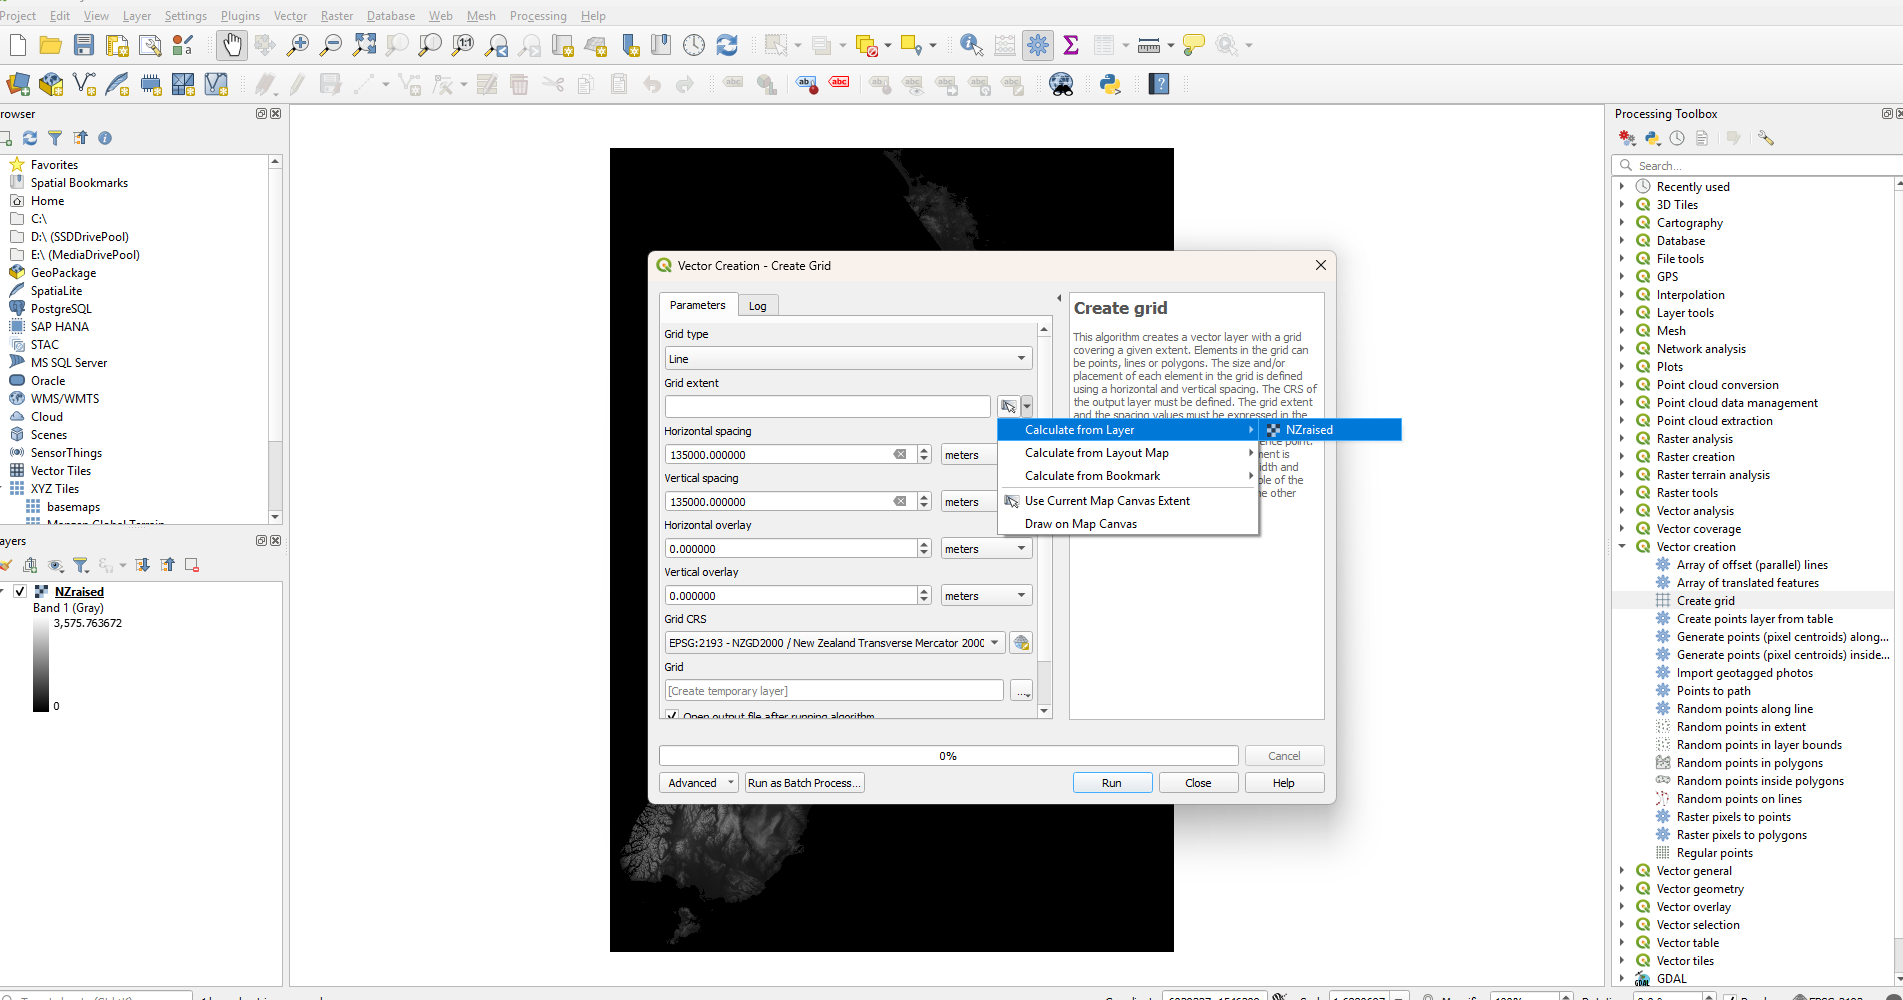
Create a new project again and add the NZraised file we created in step 6.
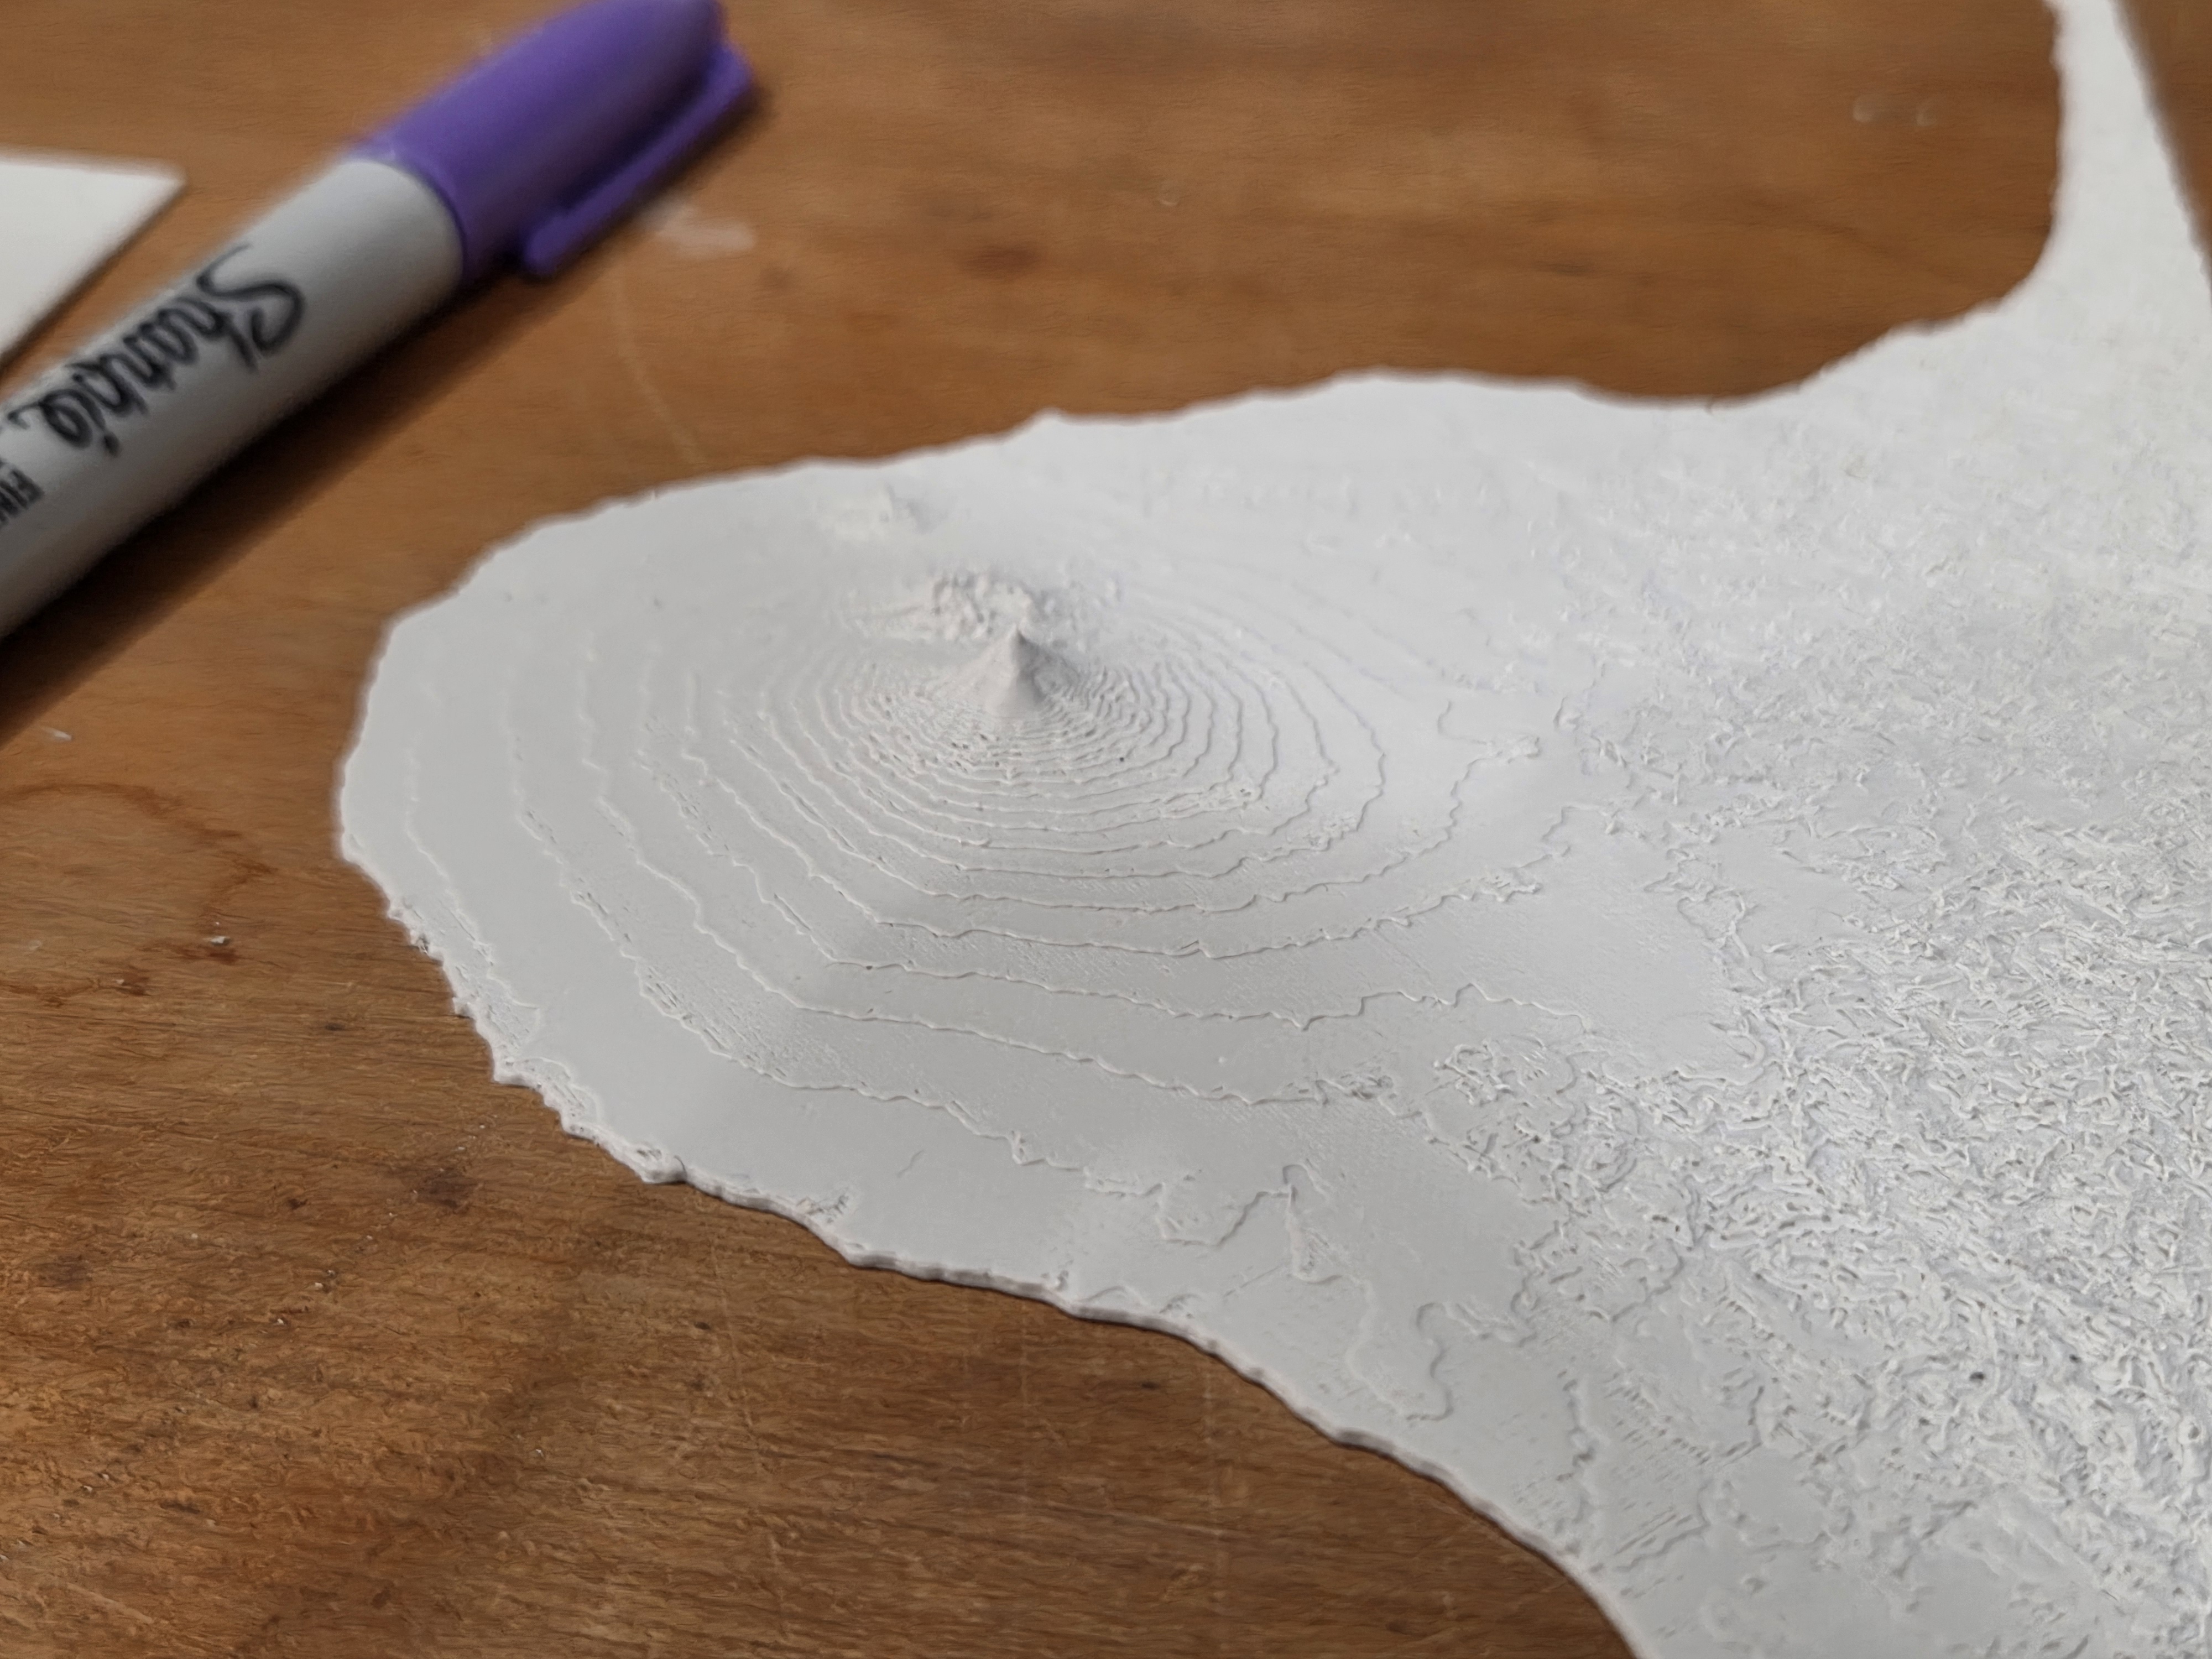
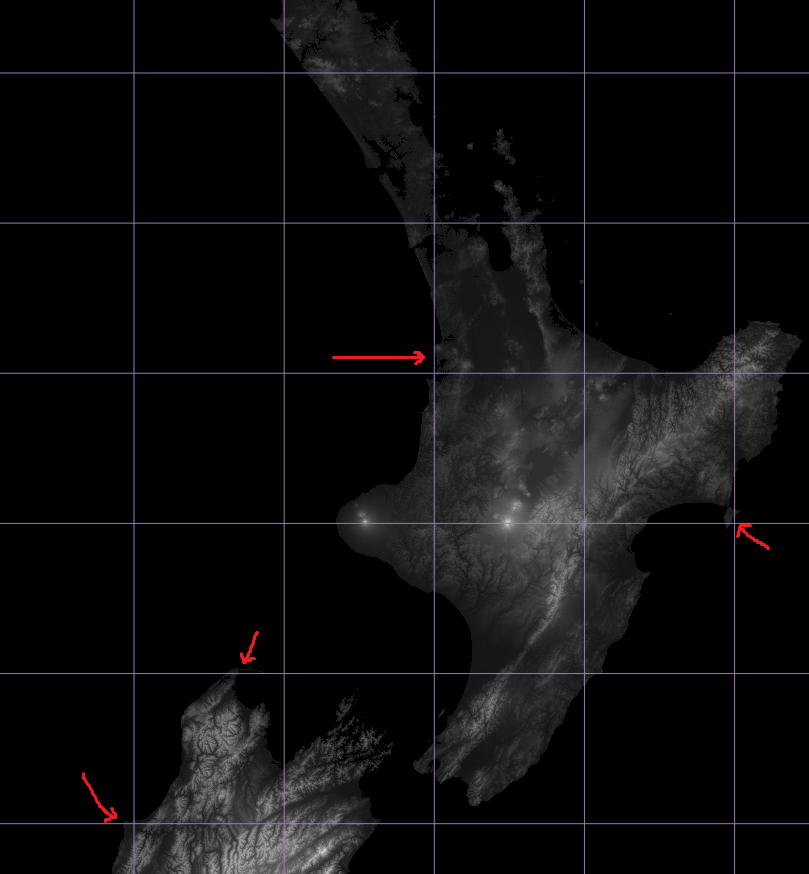
Go to Processing -> Toolbox, a bar will pop up on the right, open the Vector creation drop down and click on Create grid. Change grid type to line, select grid extent as calculate from layer and select your NZraised layer. Change the horizontal and vertical spacing to the number we got earlier, so in my example it was 136,666 meters. Click run and a grid will be displayed over your map. This is where you can kind of be as pedantic as you like, you could either just move to the next step as is and deal with any awkward prints, or you can comb over the entire map and make adjustments to your grid dimensions until there are as few 'bad' prints as possible. What I mean by bad prints is for example Mt Ruapehu could have a seam right through the summit, or a peninsula might be chopped off into it's own tiny print, so if you adjust the grid slightly it could be printed in one, but achieving this across the whole country is near on impossible, so I'd recommend just making a few small adjustments if you notice anything particularly bad that can easily be corrected for, making sure your end dimension will still fit on your wall. For example in the second screenshot below you can see my original 136,666m tiles was making a few bad prints, and I had some wiggle room in the bottom of the North Island, so I could make it slightly smaller. I reduced to 135,000m in the 3rd screenshot which removed a few small/awkward prints and still fits within the 6 tiles for my 1200mm wall.
9. Now we can actually split the map up into the tiles that you'll print.
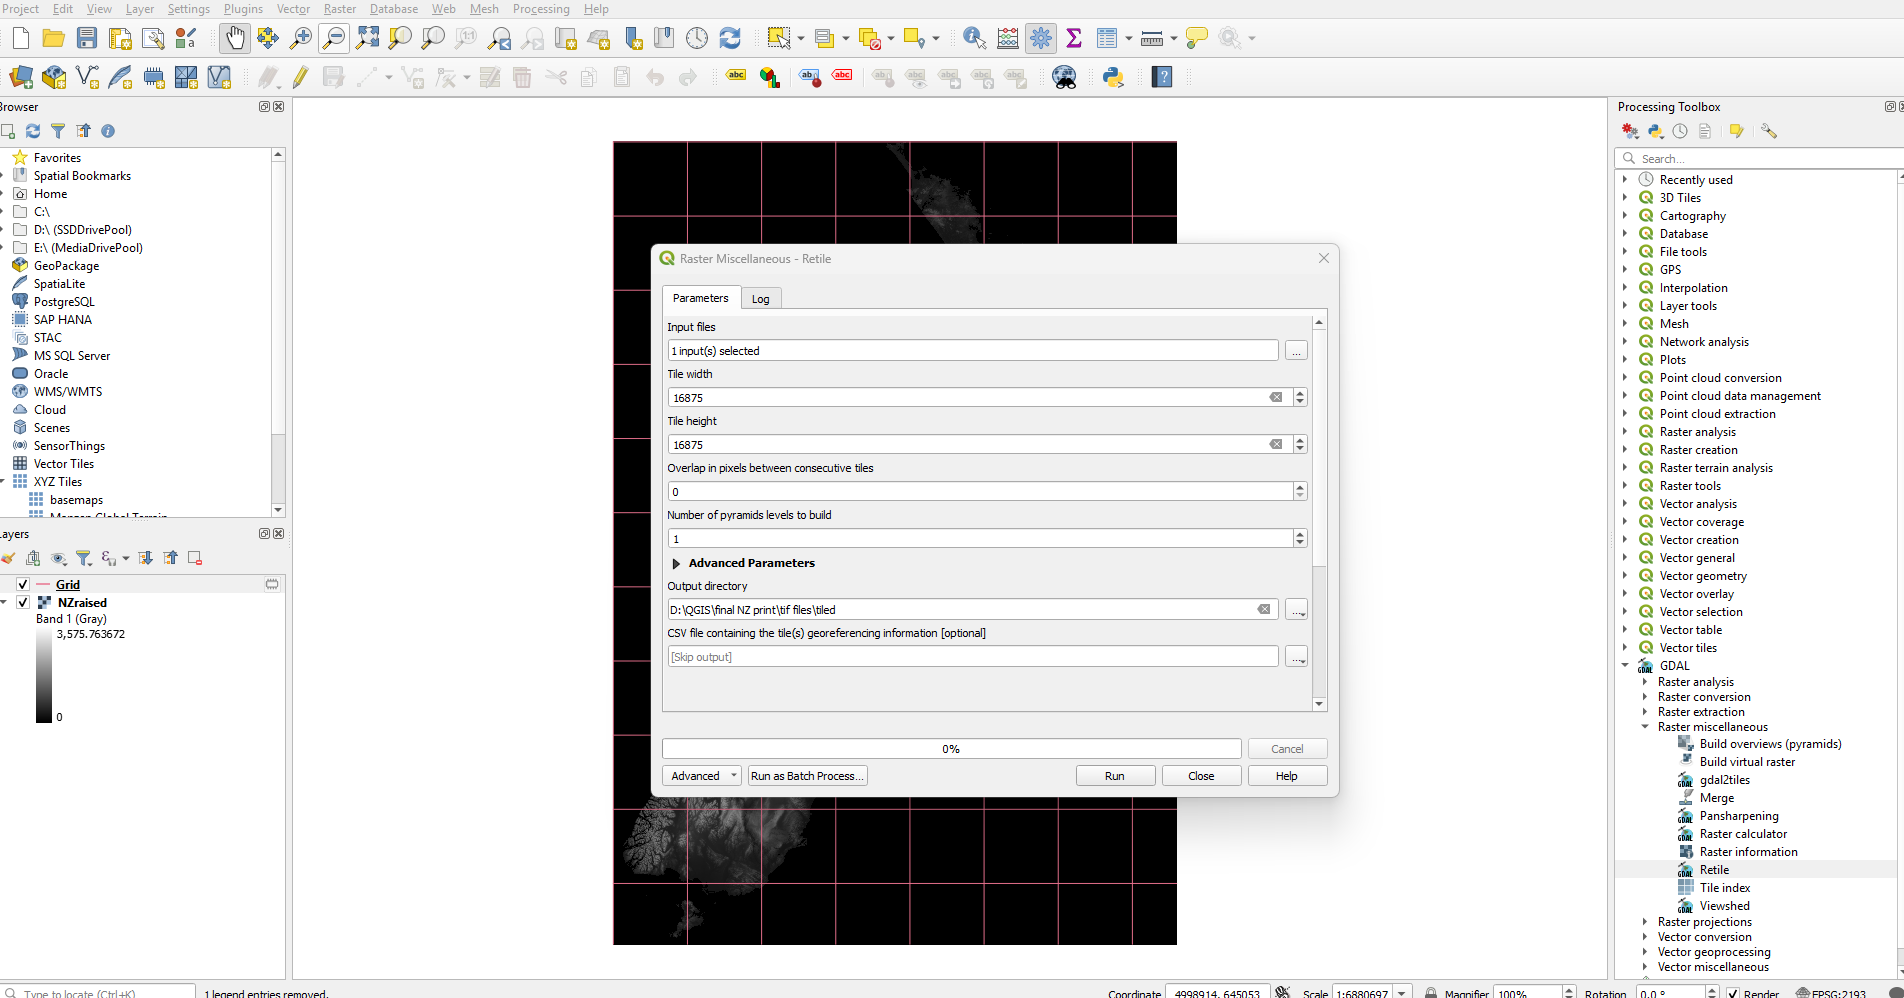
Go to The Processing Toolbox again on the right and at the bottom open the GDAL dropdown, then Raster miscellaneous, then open the Retile tool. Select your NZraised layer and then input your final grid dimensions from the previous step DIVIDED BY 8 as the original data is in 8m chunks, so if we input the 135,000 it will do 135,000 of the 8m chunks.
So from my previous example the dimensions were 135,000m per square, divide this by 8 to give me 16,875. Input this into the tile height and tile width box. Change the output directory to a new folder as this will create a bunch of files. Click run.
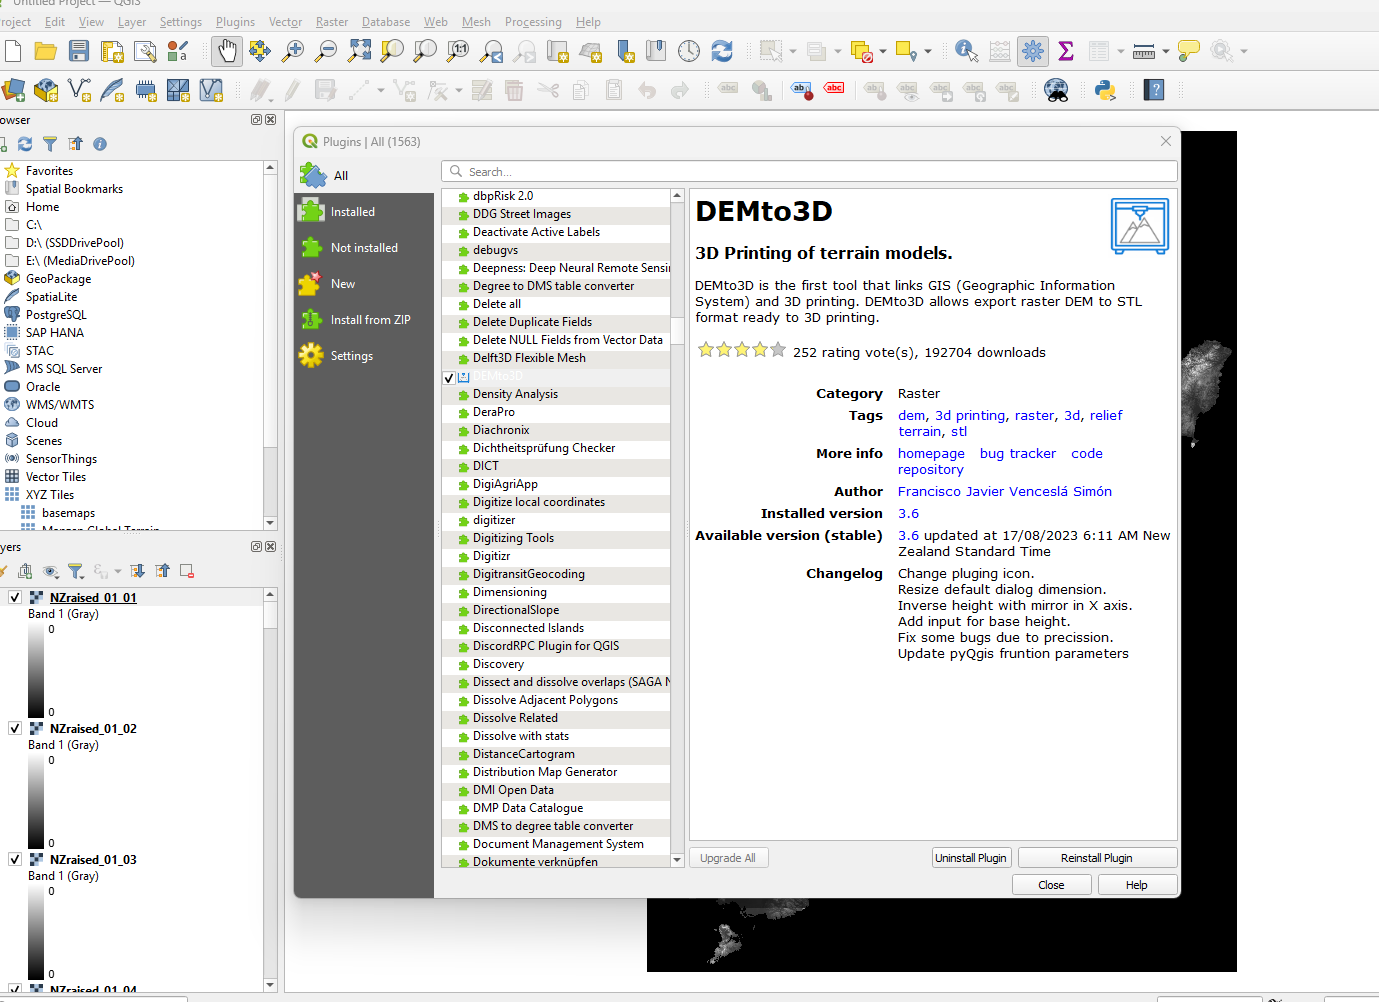
10. Once that's finished you should have a bunch of smaller .tif files (along with other supporting files). Create a new project again in QGIS and add all the new .tif files that were created.
We need a plugin called DEMto3D to convert the geographical data to a printable STL. At the top of QGIS click on Plugins and then Manage & install plugins. Go down the list until you find DEMto3D and install it.
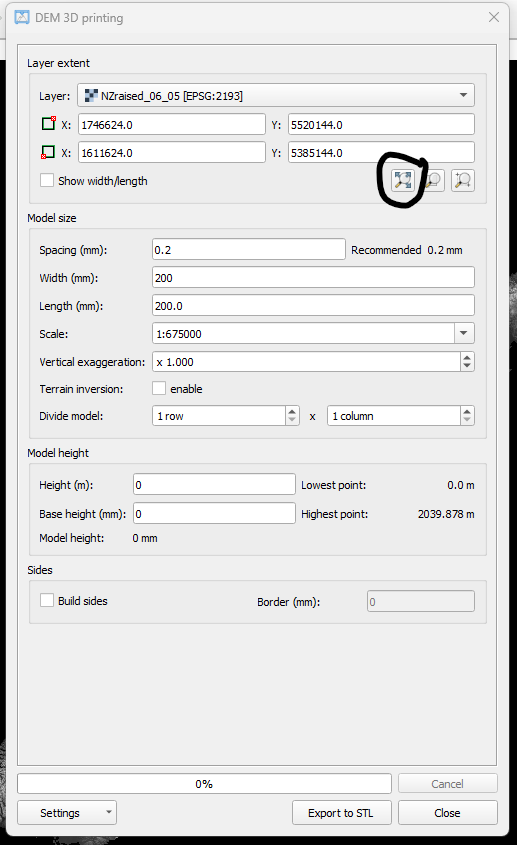
Now go to Raster at the top and click on DEMto3D.
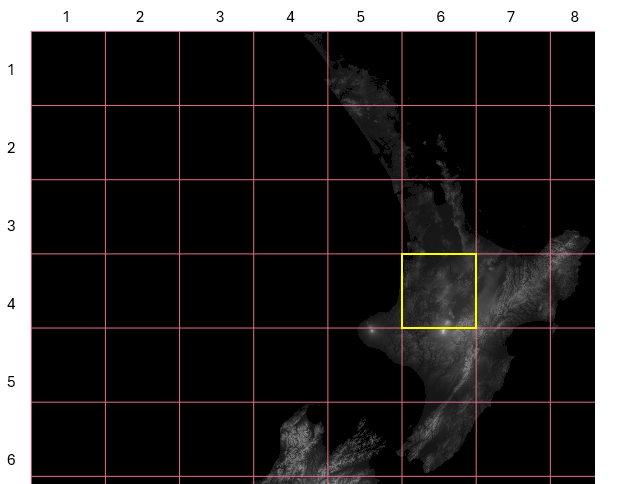
Click on a layer that you want to do first, then click on "Select full extent" to select that area of the map. There will be a lot of blank layers as it's just the surrounding blank data generated when we merged all the files together. The naming convention is pretty simple, it essentially just numbers your grid starting from 1 and names them layername_xx_yy, so for example the yellow box below would be labeled NZraised_04_06.
Use the following settings in DEMto3D:
Spacing: 0.1-0.2mm depending on size of print, I did 0.15mm to match my layer height. File size gets very large at 0.1mm (850mb per square). This setting is essentially the resolution of the outputting STL.
Width: the size of your print square (200mm for MK3S)
Height: autofilled (same as width)
Scale: autofilled
Vertical exaggeration: necessary due to how flat the earth actually is, x1.700 is a good option for a large print.
Terrain inversion: off
Divide model: 1 row x 1 column
Model Height
Height (m): 0
Base height: 0
Build sides: off
Now export to STL, and get printing! You will have to export these one at a time, but considering the print time I don't think it's much of an issue.
For Prusa slicer I use the following settings with PLA (light gray is the best!!)
Layer height: 0.15mm Quality
Infill: 30%
Perimeters: 3
Single perimeter on top surfaces (under Print Settings -> Layers and perimeters at the bottom, Expert settings must be enabled): All top surfaces
Minimum feature size (under Print Settings -> Advanced at the bottom): 38% (to reduce number of small dots over the print.